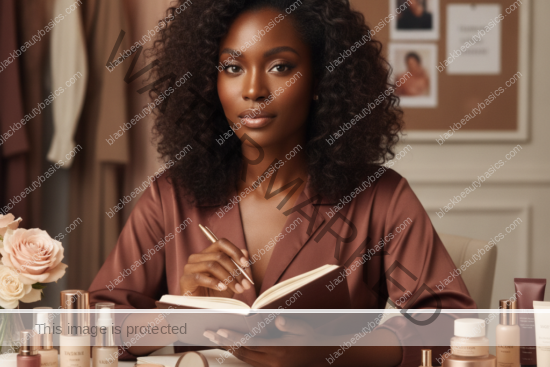
Setting Powders and Sprays for Melanin-Rich Skin (No Flashback)
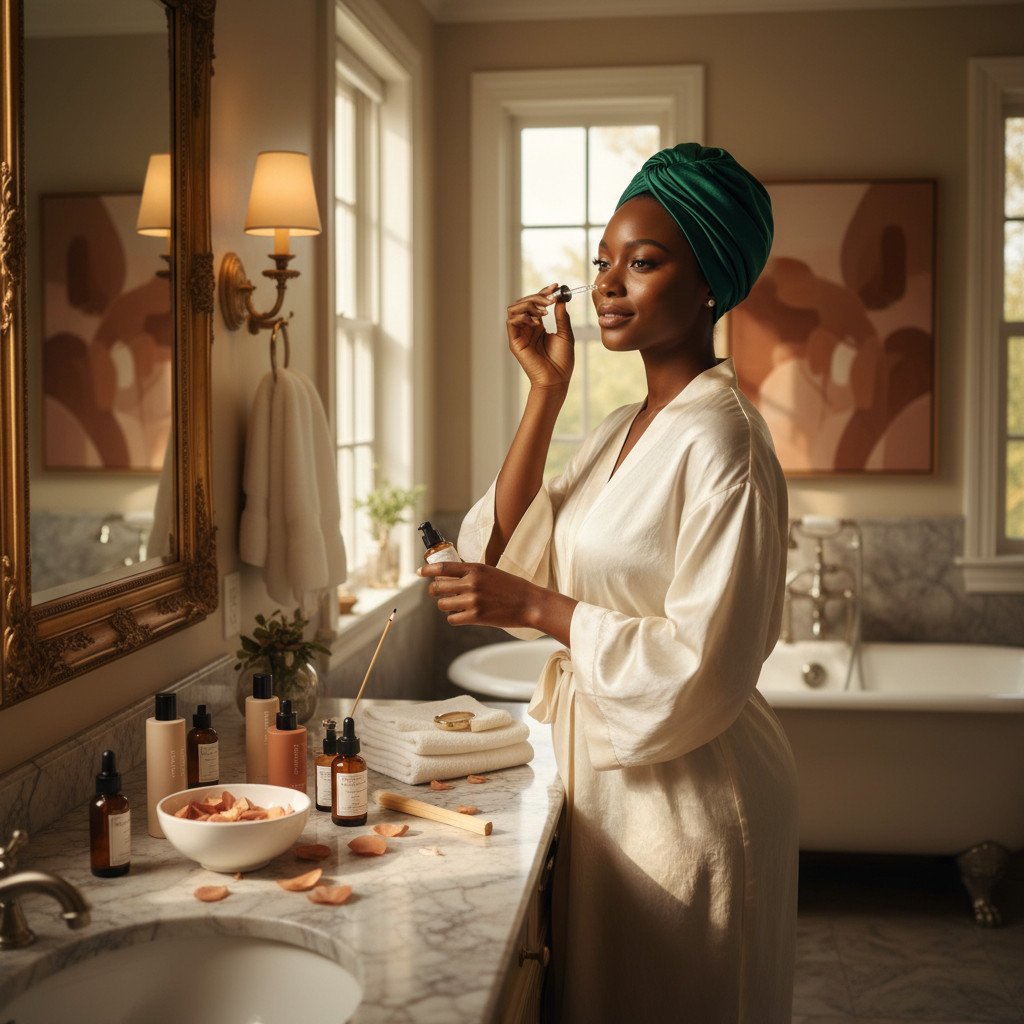
For many women with melanin-rich skin, the journey to a flawless makeup application often hits a frustrating roadblock right at the final step: setting powder. You spend precious time meticulously blending your foundation, perfecting your concealer, and sculpting your features, only to have a seemingly innocent “translucent” powder transform your radiant complexion into a ghostly, ashy, or flat canvas. The disappointment is palpable, especially when a flash photograph reveals an unwelcome white cast that belies the beauty you know is there.
This common experience is not a reflection of your makeup skills, but rather a systemic oversight in the beauty industry. Many “universal” or “translucent” powders are formulated and tested on lighter skin tones, failing to account for the unique undertones and reflective qualities of deeper complexions. What appears invisible on one skin tone can become starkly visible and unflattering on another, particularly under the harsh glare of a camera flash. The quest for a setting product that truly respects and enhances melanin-rich skin, rather than detracting from it, has been a long and often disheartening one.
At Black Beauty Basics, we understand this challenge intimately. We believe that every step of your beauty routine should celebrate your natural radiance, not diminish it. This comprehensive guide is designed to empower you with the knowledge and techniques to choose and use setting powders and sprays that control shine, lock in your meticulously applied base, and ensure your makeup remains vibrant and flashback-free. We’ll delve into formulations, application methods, and strategic product choices that honor the richness of your complexion, allowing your true glow to shine through, both in person and in photographs.
This exploration into perfecting your finish is an essential component of our broader commitment to celebrating and understanding Makeup for Deep Skin Tones. As you master the art of setting, you’ll find it seamlessly integrates with your foundation application, concealer techniques for hyperpigmentation, blush and contour strategies, and ultimately, achieving camera-ready looks that truly capture your essence. Let us guide you to a finish that is as beautiful and confident as you are.
Why Setting Looks Different on Deep Skin
The act of setting makeup, while universal in its intent to prolong wear and control shine, manifests uniquely on melanin-rich skin. The very chemical composition and light-reflecting properties of deeper complexions mean that products designed without this nuance in mind can yield dramatically different, and often undesirable, results. Understanding these fundamental differences is the first step toward selecting products that truly work with your skin, rather than against it.
At the heart of the issue lies the interaction between powder ingredients and melanin. Many traditional setting powders, particularly those marketed as “translucent,” contain a high concentration of white or silica-based pigments. While these ingredients can appear sheer on lighter skin tones, on melanin-rich skin, they can create a distinct white film or a gray, ashy cast. This occurs because the white pigments do not blend seamlessly with the natural brown, red, and golden undertones of deeper skin; instead, they sit on top, creating a visual disconnect that dulls the complexion and makes it appear lifeless. This phenomenon is exacerbated under flash photography, where the reflective nature of these white particles bounces light back directly at the camera, resulting in the dreaded “flashback” effect.
Furthermore, the texture and finish of powders play a crucial role. Deep skin often possesses a natural luminosity that can be easily obscured by overly matte or heavy powder formulas. While oil control is often a primary goal of setting, achieving it at the expense of natural radiance can make the skin look flat, dry, and even older. The ideal setting product for melanin-rich skin should, therefore, strike a delicate balance: providing necessary oil absorption and longevity without stripping the skin of its inherent vibrancy or creating an unnatural, mask-like appearance.
- Common Issues: The most frequently encountered problems include ashiness, where the skin takes on a grayish or dusty hue; flatness, where the complexion loses its natural dimension and glow; and flashback, which manifests as a stark white or ghostly appearance in flash photographs. Another concern is powder sitting visibly on top of the skin, rather than melting in, creating a textured or cakey look.
- Why Oil Control and Radiance Balance Matter: While managing oil and shine is important for extending makeup wear, it’s equally vital not to over-mattify. Melanin-rich skin often benefits from a balance that controls excess oil in targeted areas while allowing a healthy, natural radiance to show through elsewhere. The goal is a refined finish, not a completely flat one, ensuring the skin still looks hydrated and alive.
Recognizing these distinct needs is paramount. It means moving beyond generic product recommendations and seeking out formulations specifically designed or proven to perform beautifully on deeper complexions. It requires a discerning eye for ingredients, undertones, and finishes that complement, rather than clash with, the rich tapestry of melanin-rich skin.
Types of Setting Powders for Melanin-Rich Skin
Navigating the vast landscape of setting powders can be daunting, especially when seeking products that truly complement melanin-rich skin without causing common pitfalls like ashiness or flashback. Understanding the different types of powders available, and their specific characteristics, is key to making informed choices that enhance your complexion.
Loose Translucent Powders
Loose translucent powders are often the first type that comes to mind when thinking about setting makeup. They are finely milled and designed to provide a lightweight veil that sets liquid or cream products, absorbs excess oil, and blurs imperfections without adding significant coverage or color. For melanin-rich skin, however, the term “translucent” requires careful scrutiny. Many powders labeled as such contain white silica or talc, which, while appearing invisible on lighter skin, can create a stark white cast or an ashy finish on deeper complexions. This is particularly noticeable in flash photography, leading to the dreaded flashback effect.
- Pros: When formulated correctly for deep skin, these powders are incredibly light, offering a seamless finish. They are excellent for “baking” under the eyes or in areas prone to creasing, as their fine texture can effectively smooth and lock in concealer without feeling heavy. The right translucent powder can provide a soft-focus effect, blurring pores and fine lines.
- Cons: The primary drawback is the high risk of flashback or an ashy appearance if the formula is not specifically designed with melanin-rich skin in mind. Many “universal” translucent powders simply aren’t. It’s crucial to seek out brands that have developed truly invisible formulas for deeper skin tones, often indicated by a slightly warmer, more golden, or even a very faint beige tint in the powder itself.
Tinted Loose Powders
Tinted loose powders are often the safest and most effective choice for melanin-rich skin. Unlike their “translucent” counterparts, these powders contain a subtle amount of pigment that is designed to match or complement various skin tones. This tint helps to prevent the white cast often associated with traditional translucent powders, ensuring a more natural and harmonious finish. They provide a light layer of coverage, which can be beneficial for evening out the complexion or adding a touch more warmth.
- Pros: Tinted loose powders offer a much better match to deep skin tones, significantly reducing the risk of ashiness or flashback. They are excellent for all-over setting, providing a polished yet natural look. The added pigment can help to subtly enhance the skin’s natural color or provide a slight perfecting filter.
- Cons: The main challenge lies in finding the correct shade match. A powder that is too dark can deepen your foundation color, while one that is too light will still create an ashy effect. A comprehensive shade range is essential, and it’s often best to choose a shade that is either a perfect match to your skin tone or slightly warmer to enhance your natural glow.
Pressed Powders and Compacts
Pressed powders are loose powders that have been compressed into a solid form, typically housed in a compact. They are renowned for their portability and ease of application, making them ideal for touch-ups throughout the day. Pressed powders can range in coverage from sheer to medium and are available in both translucent and tinted varieties. For melanin-rich skin, tinted pressed powders are generally preferred for all-over use, while a truly invisible translucent pressed powder might be used for targeted oil control.
- Pros: Pressed powders are incredibly convenient for on-the-go touch-ups, allowing you to blot away shine and refresh your makeup without disturbing your base. They are easier to control during application compared to loose powders, minimizing mess. When chosen in the right shade and formula, they can provide a smooth, refined finish.
- Cons: If the formula is too dry or contains too much talc, pressed powders can appear heavy, chalky, or cakey on deep skin, especially if applied excessively. It’s crucial to select finely milled formulas that blend seamlessly into the skin. Choosing a shade that is too light will also lead to an ashy appearance.
When selecting any setting powder for melanin-rich skin, always pay close attention to the ingredient list and product claims. Look for terms like “flash-friendly,” “no flashback,” or “melanin-friendly.” Be wary of powders with high SPF content if you anticipate flash photography, as zinc oxide and titanium dioxide (common SPF ingredients) can cause flashback. Prioritize brands that explicitly cater to a diverse range of skin tones and offer a broad spectrum of shades in their tinted powders. Remember, a truly effective setting powder should disappear into your skin, leaving behind only a perfected, lasting finish. Explore options for effective setting powder for dark skin no flashback on Amazon to find suitable products.
Choosing the Right Shade and Finish for Deep Skin
The quest for the perfect setting powder extends beyond merely selecting a type; it delves into the nuanced world of shade and finish, elements that are profoundly impactful on melanin-rich skin. A misstep here can negate all the careful work you’ve put into your base, leading to a complexion that looks anything but vibrant and natural. Understanding how to choose the right shade and finish is paramount to achieving a truly harmonious and long-lasting makeup look.
Tinted vs “Translucent” on Dark Skin
The distinction between tinted and “translucent” powders is perhaps the most critical consideration for melanin-rich skin. As previously discussed, many powders marketed as “translucent” are simply not invisible on deeper complexions. They often contain white or light-reflecting silica particles that, when applied to brown skin, create a visible white film or an ashy cast. This is because the underlying cool tones of the white powder clash with the warm, rich undertones inherent in melanin-rich skin, resulting in an unnatural, dull appearance.
For this reason, tinted powders are generally the superior choice for all-over setting on deep skin. These powders are formulated with a subtle amount of pigment that is designed to match or complement your skin tone. They provide a sheer wash of color that helps to neutralize any potential ashiness and seamlessly blend with your foundation, enhancing your complexion rather than masking it. When selecting a tinted powder, aim for a shade that is either an exact match to your foundation or slightly warmer. A warmer tone can add a beautiful, subtle radiance, preventing your skin from looking flat. Avoid shades that are too light or too cool, as they can still lead to an ashy or dull finish. Truly sheer powders, those that genuinely disappear into deep skin without a trace of white, are rare but do exist; these are often formulated with micronized pigments or a very fine, non-white silica that does not reflect light harshly. However, if in doubt, a well-matched tinted powder is almost always the safer and more flattering option.
Matte, Natural, and Radiant Finishes
The finish of a setting powder dictates the overall look and feel it imparts to your skin. For melanin-rich skin, the choice of finish is crucial in maintaining a healthy, vibrant appearance. Overly matte powders, while effective at controlling shine, can sometimes strip deep skin of its natural luminosity, making it appear flat, dry, or even dusty. This is because melanin-rich skin often has a beautiful, inherent glow that is best preserved and enhanced, not completely obscured.
A natural finish powder is often the ideal choice for everyday wear. These powders provide oil control and longevity without completely mattifying the skin. They leave a soft, skin-like finish that allows a hint of your natural radiance to show through, creating a healthy and polished look. They are perfect for those who want to control shine in the T-zone while maintaining a subtle glow on the high points of the face.
For those with very oily skin or who prefer a completely shine-free look, a matte finish powder can be effective, but it should be used strategically. Look for finely milled formulas that are not overly drying. Apply them sparingly and only to areas where oil control is absolutely necessary, such as the T-zone. Avoid applying matte powders all over the face, as this can lead to a flat, one-dimensional appearance. Instead, consider combining a matte powder in oily areas with a natural or even a subtly radiant powder elsewhere.
Radiant finish powders, which contain very fine light-reflecting particles, can be a beautiful option for adding a subtle glow. However, caution is advised for melanin-rich skin. If the reflective particles are too prominent or too white, they can create an unnatural shimmer or even contribute to flashback. Opt for radiant powders with gold, bronze, or champagne-toned shimmer that melts seamlessly into deep skin, providing a sophisticated luminosity rather than an obvious sparkle. These are often best used sparingly on the high points of the face, rather than as an all-over setting powder.
Under-Eye vs All-Over Shades
The strategy for setting the delicate under-eye area often differs from that for the rest of the face, particularly for melanin-rich skin. The goal under the eyes is to brighten, set concealer, and prevent creasing, often while addressing concerns like hyperpigmentation or dark circles. For the rest of the face, the aim is usually to match the skin tone and provide overall longevity.
For the under-eye area, many prefer a powder that is slightly lighter than their skin tone or foundation. This can help to brighten the area and counteract any darkness. However, “slightly lighter” does not mean white or translucent. For melanin-rich skin, an under-eye powder should be a warm, brightening shade – think soft peach, golden beige, or a very subtle banana shade – that complements your undertones. These shades will effectively brighten without leaving an ashy or stark white cast. The powder should be finely milled to avoid accentuating fine lines or texture. Avoid any powder that appears stark white in the pan, as this will almost certainly cause flashback and an unnatural appearance on deep skin.
For all-over setting, the powder should ideally match your skin tone or be a very close, slightly warmer shade. The purpose here is to unify the complexion, absorb excess oil, and extend the wear of your base without altering its color. If you’ve used a tinted setting powder, ensure its shade is harmonious with your foundation. The goal is for the powder to disappear into your skin, leaving behind only a perfected finish, not an added layer of color that shifts your foundation shade. Remember, the under-eye area often requires a more targeted approach to brightening, while the rest of the face benefits from a seamless, tone-matching finish. For more insights on addressing specific concerns, you can refer to our guide on covering hyperpigmentation and dark circles.
How to Apply Setting Powder on Melanin-Rich Skin
The art of applying setting powder on melanin-rich skin is as crucial as selecting the right product. Even the most perfectly matched powder can appear unflattering if applied incorrectly. The goal is to set your makeup seamlessly, control shine, and enhance your complexion without creating a heavy, cakey, or ashy finish. This requires a nuanced approach, understanding the difference between setting and baking, and knowing where to strategically place your powder.
Prep: Make Sure Your Base Is Smooth First
Before any powder touches your face, the canvas beneath must be impeccably prepared. The effectiveness of your setting powder hinges entirely on the smoothness and blend of your liquid or cream base. Any creasing, patchiness, or unblended areas will be magnified by powder, making your makeup look less polished and more textured. Therefore, take a moment to ensure your foundation and concealer are perfectly blended and settled into the skin.
After applying your foundation and concealer, allow them a minute or two to “set” slightly on your skin. This gives them a chance to meld with your natural oils and reduces the likelihood of them shifting when powder is applied. Crucially, before applying powder, gently tap or press any areas where creasing commonly occurs, particularly under the eyes and around the smile lines. Use a clean finger, a damp beauty sponge, or a small, fluffy brush to lightly press out any lines that may have formed. This step is vital because if you set creased concealer, those creases will be locked in place for the duration of your wear. For a comprehensive guide on achieving a flawless base, refer to our expert advice on foundations for deep skin tones.
Ensure your skin is not overly wet or tacky from your liquid products, but also not completely dry. A slightly tacky surface provides a better grip for the powder, allowing it to adhere smoothly and evenly. If your skin feels too wet, you risk creating patches or a muddy appearance. If it’s too dry, the powder might not adhere well and could look powdery on top of the skin. This delicate balance ensures that your powder application is the final, perfecting touch, rather than a corrective measure.
Setting vs Baking on Dark Skin
The terms “setting” and “baking” are often used interchangeably, but they refer to distinct techniques with different outcomes, especially on melanin-rich skin. Understanding these differences is key to choosing the right approach for your desired finish and skin type.
Setting involves applying a thin, light layer of powder to lock in liquid or cream products, absorb excess oil, and extend wear. For deep skin, setting should always be done with a light hand and a finely milled, well-matched powder. The technique typically involves gently pressing or dusting the powder onto the skin using a brush, puff, or sponge. The aim is to create a seamless, natural finish that doesn’t look or feel heavy. This method is suitable for everyday wear and for those who prefer a more natural or radiant complexion, as it allows the skin’s natural luminosity to shine through while providing necessary longevity.
Baking, on the other hand, is a more intensive technique that involves applying a generous amount of loose powder (often a finely milled translucent or brightening tinted powder) to specific areas, letting it sit and “cook” on the skin for 5-10 minutes, and then dusting off the excess. The warmth from your skin helps the powder to melt into your base, creating a super-smooth, poreless, and long-lasting finish, particularly under the eyes and in the T-zone. While baking can be transformative for some, it carries a higher risk for melanin-rich skin. If the powder is too white, too heavy, or not properly dusted off, it can lead to severe ashiness and flashback. Baking should only be attempted with powders specifically formulated to be flashback-safe and truly invisible on deep skin, or with finely milled tinted powders that perfectly complement your undertone.
For melanin-rich skin, if you choose to bake, exercise extreme caution. Opt for a finely milled, tinted powder in a warm, brightening shade (like a banana powder) rather than a stark white translucent one. Apply a thin, even layer, allow it to sit for a shorter duration (3-5 minutes), and meticulously dust off every speck of excess powder with a fluffy brush. The goal is a smooth, brightened effect, not a heavy, powdery finish. For most everyday looks, a light setting application is generally sufficient and safer, particularly under the eyes, where heavy powder can accentuate fine lines. Always prioritize thin layers, regardless of the technique, to maintain a natural, vibrant complexion.
Targeted Setting: Where to Place Powder
Strategic placement of setting powder is essential for achieving a balanced finish that controls shine where needed while preserving natural radiance elsewhere. For melanin-rich skin, a “less is more” approach is often best, focusing on areas prone to oiliness or creasing, rather than powdering the entire face.
- T-zone (Forehead, Nose, Chin): These areas are typically the oiliest and benefit most from powder. Use a fluffy brush or a damp sponge to lightly press powder into these zones. This will help to control shine throughout the day and extend the wear of your foundation.
- Under-Eyes: After ensuring your concealer is crease-free, gently press a small amount of finely milled powder (preferably a brightening tinted shade) under your eyes. A small, tapered brush or a damp mini-sponge is ideal for this. This sets the concealer, prevents creasing, and can subtly brighten the area. Remember, thin layers are paramount here to avoid a cakey look or accentuating fine lines.
- Sides of the Nose and Smile Lines: These are other common areas for creasing and oil accumulation. Lightly press powder into these specific zones to lock in your base and prevent makeup from settling into lines.
- Cheeks and Forehead (Perimeter): Unless you have extremely oily skin all over, consider leaving these areas with minimal or no powder. This allows your natural skin texture and luminosity to shine through, preventing a flat or dull appearance. If you’ve applied blush or contour, a very light dusting of powder around the edges can help to meld everything together without dulling the color or highlight.
Tools for Application:
- Powder Puff: Ideal for pressing powder firmly into the skin, offering maximum oil control and longevity. Great for targeted setting in the T-zone or for baking. Use a rolling or pressing motion rather than swiping.
- Damp Beauty Sponge: Excellent for pressing powder into the skin, especially under the eyes. The dampness helps the powder melt into the skin for a seamless, non-powdery finish. Use a stippling or pressing motion.
- Fluffy Powder Brush: Best for a light, all-over dusting or for buffing away excess powder. Provides a sheerer application and a more natural finish. Use a gentle sweeping or circular motion.
Regardless of the tool, the key is to pick up a small amount of product, tap off any excess, and apply with a pressing or rolling motion rather than sweeping. Sweeping can disturb the liquid or cream products underneath. Start with a minimal amount and build up if necessary. The goal is to achieve a set, perfected finish that still looks like radiant, healthy skin, not a mask of powder. For a quick everyday routine that incorporates efficient setting, you might find inspiration in our guide to an everyday 10-minute natural makeup routine.
Setting Sprays for Melanin-Rich Skin
While setting powders are essential for controlling shine and locking in your base, setting sprays offer a powerful complementary step, especially for melanin-rich skin. These liquid formulations serve multiple purposes: they can melt powders into the skin, removing any powdery cast; they can adjust the overall finish of your makeup (making it more matte or more dewy); and, most importantly, they can significantly extend the wear of your makeup, ensuring it stays fresh and vibrant for hours. For deep skin, a well-chosen setting spray can be the secret weapon against a flat, dull, or overly powdery look, restoring a natural, hydrated glow.

Finishing Sprays vs Long-Wear Setting Sprays
It’s important to distinguish between two main categories of sprays, as their functions and benefits differ:
- Finishing Sprays (or Refreshing/Hydrating Mists): These sprays are primarily designed to “finish” your makeup by helping powders meld seamlessly with your skin, creating a more natural, skin-like appearance. They often contain hydrating ingredients like glycerin, hyaluronic acid, or botanical extracts. Finishing sprays are excellent for removing any residual powdery look, adding a subtle glow, or simply refreshing your complexion throughout the day. They typically do not offer significant long-wear benefits but are invaluable for achieving a fresh, dewy, and non-cakey finish, which is particularly beneficial for melanin-rich skin that can sometimes appear dry or flat with powder.
- Long-Wear Setting Sprays: These are the workhorses of makeup longevity. Formulated with film-forming polymers, long-wear setting sprays create a flexible, invisible barrier over your makeup that locks it in place, making it resistant to smudging, fading, and transferring. They are designed to withstand humidity, sweat, and friction, ensuring your makeup lasts through long days, events, or challenging weather conditions. These sprays are crucial for special occasions or when you need your makeup to perform for extended periods. While some can feel slightly tighter on the skin due to the film-forming agents, many modern formulas are lightweight and comfortable.
For melanin-rich skin, both types of sprays have their place. A finishing spray can be used after powder to immediately eliminate any ashiness or powdery texture, while a long-wear setting spray is your go-to for ensuring your meticulously applied look stays put, especially when paired with a flash-friendly powder. Many brands now offer hybrid sprays that aim to provide both a natural finish and extended wear.
Choosing the Right Setting Spray for Your Skin Type
Just like with powders, selecting the appropriate setting spray involves considering your individual skin type and desired outcome:
- For Oily Skin: If your primary concern is shine control and makeup longevity, opt for a long-wear setting spray specifically formulated to be mattifying or oil-controlling. Look for ingredients like witch hazel, silica, or absorbent polymers. These sprays will help to keep excess oil at bay, preventing your makeup from breaking down. However, ensure they don’t leave a white residue or overly dry out your skin.
- For Dry Skin: Dry skin benefits immensely from hydrating finishing sprays. Look for formulas rich in humectants like glycerin, hyaluronic acid, and nourishing botanical extracts. These sprays will add a boost of moisture, prevent your makeup from looking cakey or tight, and restore a healthy, dewy glow. If you need long-wear, choose a hydrating long-wear spray or layer a hydrating mist over a traditional long-wear spray.
- For Combination Skin: This skin type often requires a balanced approach. You might benefit from a long-wear setting spray that offers a natural or slightly satin finish, rather than extreme matte or dewy. Alternatively, you can use a mattifying spray in your T-zone and a hydrating mist on the drier areas of your face, or simply use a long-wear spray all over and follow up with a targeted hydrating mist if certain areas feel too dry.
Always read product descriptions carefully. Look for claims like “oil-free,” “non-comedogenic,” “hydrating,” “mattifying,” or “long-lasting” to match your specific needs. Pay attention to the mist quality as well; a fine, even mist is crucial for seamless application without creating droplets or disturbing your makeup.
How to Use Setting Spray with Powder on Deep Skin
Integrating setting spray into your routine after powder application is a game-changer for melanin-rich skin, helping to achieve a natural, skin-like finish and extend wear. The technique is simple yet effective:
- After Powder Application: Once you have applied all your powders (setting powder, blush, bronzer, highlight), hold the setting spray bottle about 8-12 inches away from your face.
- Even Mist: Close your eyes and mouth, and spray in an “X” and “T” motion across your face. This ensures even coverage. Aim for 2-4 pumps, depending on the spray and your preference. The goal is to lightly dampen your face, not drench it.
- Allow to Dry: Let the spray air dry completely. As it dries, it will help to dissolve any powdery residue, melding all your makeup layers together. You’ll notice your skin looking more hydrated, less powdery, and more like natural skin.
- Optional Second Mist: For extra longevity, especially with a long-wear setting spray, you can apply a second light mist once the first layer has dried. This creates an even stronger barrier against environmental factors.
- Blotting Throughout the Day: Even with setting spray, if you have oily skin, you might need to blot excess oil throughout the day. Use blotting papers or a clean tissue to gently press onto oily areas, then a quick, light mist of a refreshing spray can revive your look without adding more powder.
Using a setting spray after powder is particularly beneficial for melanin-rich skin because it helps to remove any potential ashy cast that might have resulted from powder application, even with well-matched products. It brings life back to the complexion, ensuring your makeup looks fresh, vibrant, and seamlessly integrated. Explore various long-wear setting sprays on Amazon to find the perfect match for your needs.
Locking in Blush, Contour, and Highlight Without Killing the Glow
One of the most delicate balances in makeup application for melanin-rich skin is setting the face without dulling the vibrancy of blush, the definition of contour, or the luminosity of highlight. These elements are crucial for adding dimension, warmth, and a healthy glow to deeper complexions. An indiscriminate application of setting powder can easily flatten these features, making them appear muted or even disappear entirely. The key lies in strategic application and product choice, ensuring your sculpted and radiant look remains intact and long-lasting.
Setting the Center, Letting the Perimeter Glow
The principle of targeted powder application is especially relevant when preserving the vibrancy of your cheek products. Instead of sweeping powder across your entire face, focus on the areas that genuinely require oil control and setting, typically the T-zone and under-eyes. This means applying a heavier hand (or more product) through the center of your face – your forehead, down the bridge of your nose, and on your chin. These areas are often the first to show shine and benefit most from a mattifying or oil-absorbing powder.
Conversely, the perimeter of your face, particularly your cheeks and temples, often requires a much lighter touch, or sometimes no powder at all. This is where blush, bronzer, and highlight are typically concentrated, and where your natural skin’s luminosity can truly shine. By setting the center of your face more thoroughly, you create a long-lasting, shine-free base where oil tends to accumulate, while allowing the outer areas to retain a fresh, dewy, and dimensional quality. If you do need to set your cheeks, use a very large, fluffy brush with minimal product, lightly dusting it over the areas where you haven’t applied blush or highlight, or just a whisper over the blush itself to meld it into the skin without dulling its intensity. This technique ensures that your blush pops and your skin maintains its healthy glow, rather than appearing uniformly matte. For inspiration on selecting shades that truly stand out, explore our guide on blush colors that pop on dark skin.
Where (and Where Not) to Put Powder Over Highlight
Highlight is designed to catch and reflect light, creating a luminous, almost wet-look glow on the high points of your face. Applying powder directly over a highlight can completely negate this effect, transforming a radiant sheen into a dull, flat patch. Therefore, the strategic placement of powder around your highlight is paramount to preserving its impact.
- Avoid Direct Application: The golden rule is to avoid applying setting powder directly on top of your highlight. If you’ve used a cream or liquid highlight, allow it to dry down slightly before applying any powder nearby.
- Set the Edges: Instead of powdering the highlight itself, focus on lightly setting the areas immediately surrounding it. For instance, if your highlight is on your cheekbones, you might lightly powder the area just below your highlight (where your blush might be) and the area just above it (closer to your temple). This helps to create a clean, defined edge for your highlight without dulling its center.
- Consider Powder Highlights: If you’re using a powder highlight, it inherently has a dry finish and doesn’t typically need to be set with another powder. In fact, adding more powder could make it look cakey or diminish its reflective quality.
- Use a Finishing Spray: After all powders are applied, a hydrating or finishing spray is your best friend. A fine mist will help to melt all the powders into your skin, including any light dusting over your blush, and will reactivate the luminosity of your highlight, making it appear more seamless and skin-like without adding a powdery layer. This step is crucial for bringing back the “life” to your complexion after powder application.
By being mindful of where you apply your setting powder, you can ensure that your blush retains its vibrant hue, your contour maintains its sharp definition, and your highlight continues to catch the light beautifully, enhancing the natural radiance of your melanin-rich skin. For a deeper dive into sculpting your features, consult our guide on contour and highlight for deep skin without ashiness.
Flashback 101: Testing Your Powder and Spray
The phenomenon of flashback is a particularly vexing issue for individuals with melanin-rich skin. You’ve spent time perfecting your makeup, feeling confident and beautiful, only to see a photograph reveal a stark white or ghostly cast on your face. This unwelcome surprise can instantly undermine your confidence and ruin what was otherwise a flawless look. Understanding what causes flashback and, more importantly, how to test for it and prevent it, is essential for anyone with deep skin tones who wants to look their best in every light, especially under flash photography.
Flashback occurs when certain ingredients in makeup products, particularly powders, reflect light directly back at the camera’s flash. While these ingredients might be invisible to the naked eye under natural light, they become highly reflective when exposed to a sudden burst of intense light. On lighter skin tones, this reflection might be subtle or even go unnoticed. However, on melanin-rich skin, the contrast between the reflective particles and the deeper skin tone is far more pronounced, making the white cast appear stark and unnatural. This is why a product that claims to be “flash-friendly” might still cause flashback on deeper complexions if it hasn’t been specifically formulated and tested across a diverse range of skin tones.
Ingredients and Finishes That Can Cause Flashback
Several common ingredients and finishes in setting powders are notorious for causing flashback, especially on melanin-rich skin:
- White Silica (Silica Silylate, Silica): This is perhaps the most common culprit. While finely milled silica can provide a silky texture and excellent oil absorption, its white, crystalline structure is highly reflective. When used in high concentrations, particularly in powders marketed as “translucent,” it can create a strong white cast under flash. The finer the milling, the less likely it is to cause severe flashback, but the risk remains.
- Titanium Dioxide and Zinc Oxide (SPF Ingredients): These mineral sunscreens are white pigments that work by physically blocking and reflecting UV rays. While crucial for sun protection, their reflective properties are a primary cause of flashback in flash photography. If a powder (or foundation) contains SPF, especially in significant amounts, it is highly likely to cause flashback. For events where flash photography is expected, it’s best to opt for makeup products without SPF, or to use chemical sunscreens underneath your base instead of mineral ones within your makeup.
- Talc: While not as inherently reflective as silica, talc can contribute to a powdery, ashy look if it’s too white or used in large quantities, especially if it doesn’t melt seamlessly into the skin.
- Excessive Pearlescent or Shimmer Particles: While some finely milled, skin-toned shimmer can add a beautiful glow, powders with overtly white, silver, or chunky glitter particles can reflect light too intensely, leading to a patchy, overly shiny, or flashback-prone appearance under flash.
When selecting a setting powder, scrutinize the ingredient list. If silica, titanium dioxide, or zinc oxide are high on the list, proceed with caution, especially if the product is marketed as “translucent” without specific mention of being flashback-safe for deep skin. Opt for tinted powders or those that explicitly state “no flashback” and have been reviewed by individuals with similar skin tones. The finish also matters: overly matte powders can sometimes appear flat and dull, while a natural or satin finish often looks more forgiving and skin-like, even under flash.
The Flash Test at Home
The most reliable way to determine if a setting powder or spray will cause flashback on your melanin-rich skin is to perform a simple flash test at home. This proactive step can save you from future photographic disappointments. Here’s how to do it:
- Full Face Application: Apply your full makeup look, including your foundation, concealer, setting powder, and setting spray, exactly as you would for a special event. Ensure everything is fully blended and set.
- Choose Your Lighting: Move to a well-lit area, ideally with both natural and artificial light sources available. This helps you see how your makeup looks in various conditions.
- The Phone Camera Test: Use your smartphone camera for the test. Most phone cameras have a built-in flash that mimics the effect of a professional camera flash.
- Step 1: Take a photo without flash. Observe how your makeup looks in natural light.
- Step 2: Activate your phone’s flash (ensure it’s on “auto” or “on,” not “off”). Take several photos from different angles and distances, including close-ups of your face.
- Step 3: Review the photos immediately. Look for any areas that appear significantly lighter, whiter, or ashier than the rest of your face. Pay close attention to your under-eye area, T-zone, and any areas where you applied a heavier amount of powder.
- Adjust and Re-test: If you notice flashback, make adjustments (see next section) and repeat the flash test until you are satisfied with the results.
This simple test is invaluable. It allows you to identify problematic products or application techniques before a crucial event, giving you the opportunity to make necessary changes. Remember that different cameras and lighting conditions can affect the outcome, so testing in a variety of settings can provide the most comprehensive assessment. For more tips on looking your best in front of the lens, delve into our guide on makeup for photos and video on deep skin.

Adjusting If You See a White Cast
Discovering a white cast or flashback during your at-home flash test can be disheartening, but it’s also an opportunity to refine your technique and product choices. Here’s how to adjust and correct the issue:
- Dust Off Excess Powder: Often, flashback is simply due to too much powder. If you see a white cast, take a large, clean, fluffy powder brush and gently but thoroughly dust off any excess powder from your face. Use a light, sweeping motion, ensuring you don’t disturb your base makeup. Sometimes, this simple step is enough to resolve the issue.
- Apply a Tinted Powder: If dusting off doesn’t fully work, or if your “translucent” powder is inherently too white, you can try layering a very thin veil of a finely milled, tinted setting powder over the problematic areas. Choose a shade that perfectly matches your skin tone or is slightly warmer. This tinted layer can help to neutralize the white pigments and restore warmth to your complexion. Apply with a soft brush or puff, pressing gently.
- Use a Hydrating or Finishing Spray: A generous mist of a hydrating or finishing spray can work wonders. The moisture from the spray helps to melt powders into the skin, reducing their powdery appearance and often diminishing the white cast. It can also reactivate the natural oils of your skin, making the makeup look more seamless and less reflective.
- Blot and Re-Apply (Carefully): If the flashback is severe, you might need to gently blot the area with a clean tissue or blotting paper to lift some of the problematic powder. Then, re-apply a very minimal amount of a flashback-safe, tinted powder, focusing only on the areas that truly need setting.
- Change Your Powder: Ultimately, if a particular “translucent” powder consistently causes flashback despite your best efforts, it’s likely not suitable for your melanin-rich skin. Invest in a tinted setting powder that is known for being flashback-safe on deep skin tones, or a truly invisible translucent powder specifically formulated for darker complexions. Prioritize brands that offer a diverse shade range and explicit “no flashback” claims.
Remember, the goal is to achieve a finish that looks natural and beautiful in all lighting conditions. By understanding the causes of flashback and employing these corrective strategies, you can ensure your melanin-rich skin always looks radiant and flawless, both in person and in every photograph.
Everyday vs Event-Level Setting for Deep Skin
The demands placed on your makeup vary significantly between a casual everyday look and a high-stakes event. Consequently, your setting routine should also adapt to these different scenarios. For melanin-rich skin, this means understanding how to scale your powder and spray application to provide just enough longevity for a quick outing, or maximum staying power for a long, demanding day or night, all while preserving your complexion’s natural vibrancy and avoiding common pitfalls like ashiness or flashback.
Light Setting for Everyday Wear
For your daily routine, the emphasis is typically on speed, comfort, and a natural-looking finish. You want your makeup to last through your typical activities without feeling heavy or looking overly “done.” A light setting approach is ideal here, focusing on targeted oil control and a subtle enhancement of your natural beauty.
- Minimal Powder, Strategic Placement: Instead of powdering your entire face, concentrate your efforts on the areas most prone to shine: your T-zone (forehead, nose, chin) and perhaps lightly under your eyes to set concealer. Use a large, fluffy brush or a damp beauty sponge to press a very thin layer of finely milled, tinted setting powder into these specific areas. The goal is to absorb excess oil and prevent creasing without creating a matte mask. Allow the rest of your face, especially your cheeks, to retain a natural, healthy glow.
- Hydrating or Refreshing Spray: Follow up with a light mist of a hydrating or refreshing setting spray. This step is crucial for melting any visible powder into your skin, ensuring a seamless, skin-like finish. It also adds a touch of moisture, preventing your makeup from looking dry or flat, which is particularly beneficial for melanin-rich skin. This type of spray might not offer extreme longevity, but it will help your makeup look fresh and natural for several hours.
- Quick Touch-Ups: For everyday wear, a small compact pressed powder and blotting papers are your best friends for quick touch-ups throughout the day. A light blot and a quick press of powder in oily areas will refresh your look without adding excessive layers.
This light setting approach ensures your makeup looks effortless and radiant, perfectly suited for work, errands, or casual gatherings. It respects your skin’s natural texture and luminosity, allowing your true beauty to shine through. For a quick and efficient daily routine, you might find inspiration in our guide to an everyday 10-minute natural makeup routine.
Long-Wear Setting for Weddings, Nights Out, and Heat
When your makeup needs to withstand the rigors of a wedding, a long night out, or challenging conditions like heat and humidity, your setting routine needs to be elevated. The focus shifts to maximum longevity and resilience, ensuring your look remains flawless from start to finish, without smudging, fading, or creasing.
- Strategic Powdering with Purpose: For long-wear situations, a more comprehensive powder application is often necessary, but it still needs to be strategic. After applying your foundation and concealer, consider a light “baking” technique in your under-eye area and T-zone using a finely milled, flashback-safe tinted powder. This will provide superior oil control and creasing prevention. For the rest of your face, use a well-matched tinted setting powder, applied with a damp sponge or powder puff, pressing it firmly into the skin. This pressing motion helps the powder meld with your base, creating a more durable layer.
- Layering Setting Sprays: This is where setting sprays truly shine.
- Step 1 (After Liquids/Creams, Before Powder): Some makeup artists advocate for a light mist of long-wear setting spray after your liquid foundation and concealer, but before powder. This creates an initial layer of longevity.
- Step 2 (After All Powders): Once all your powders (setting powder, blush, bronzer, highlight) are applied, generously mist your face with a high-performance, long-wear setting spray. Ensure even coverage with “X” and “T” motions. This step is critical for locking everything in place and removing any powdery finish. Let it air dry completely.
- Step 3 (Optional Second Layer): For ultimate bulletproof wear, once the first layer of setting spray is dry, you can apply a second, lighter mist. This creates a reinforced barrier against environmental factors.
- Blotting and Touch-Up Strategy: Even with the most robust setting, carrying blotting papers is wise for long events. Instead of adding more powder throughout the night, which can lead to a cakey look, first blot away excess oil. If you feel you need a refresh, a very light dusting of a pressed powder in your T-zone, or a quick mist of a refreshing spray, can revitalize your makeup without over-layering.
- Flash-Friendly Formulas: For events with flash photography, double-check that all your setting products (and foundation/concealer) are flashback-safe. Avoid SPF in your base makeup and opt for tinted or truly invisible translucent powders.
By employing these advanced setting techniques, you can confidently navigate any event, knowing your melanin-rich skin will look flawless, vibrant, and perfectly set, regardless of the challenges the day or night may bring. The key is to build layers of longevity strategically, ensuring your makeup performs without compromise.
Frequently Asked Questions
Why do “translucent” powders make me look gray or ashy?
Many “translucent” powders contain white silica or talc that, while appearing invisible on lighter skin, can create a stark white film or a gray, ashy cast on melanin-rich skin. This happens because the white pigments do not blend seamlessly with the natural warm undertones of deeper complexions, creating a visual disconnect that dulls the skin.
How can I tell if a setting powder will cause flashback on my dark skin?
The most reliable method is to perform a flash test at home: apply your full makeup, then take several photos with your smartphone camera’s flash on. If you see a white, ghostly, or significantly lighter cast on your face in the photos, the powder is likely to cause flashback.
Should my under-eye powder be lighter than my all-over powder?
Yes, your under-eye powder can be slightly lighter than your all-over powder, but it should be a warm, brightening shade (like a soft peach or golden banana) rather than stark white. This helps to brighten the area and counteract darkness without creating an ashy or unnatural appearance on melanin-rich skin.
Do I need both setting powder and setting spray?
While not always strictly necessary, using both setting powder and setting spray offers synergistic benefits for melanin-rich skin. Powder controls shine and sets your base, while spray melts powders into the skin, removes any powdery cast, and significantly extends makeup wear, ensuring a more natural and long-lasting finish.
How do I keep my T-zone matte without drying out the rest of my face?
Focus your powder application strategically on your T-zone, using a pressing motion with a powder puff or damp sponge to maximize oil absorption. For the rest of your face, use minimal to no powder, or a hydrating setting spray to keep those areas fresh and luminous, preventing a uniformly dry or flat look.
Is baking safe for deep skin, or should I avoid it altogether?
Baking can be safe for deep skin if done with extreme caution and the right products. Use a finely milled, flashback-safe tinted powder in a warm, brightening shade, apply a thin layer, and meticulously dust off all excess after a shorter “bake” time (3-5 minutes) to avoid ashiness or flashback.
How often should I touch up with powder during the day?
The frequency of touch-ups depends on your skin type and environment. For most, blotting excess oil with blotting papers first, then lightly pressing a small amount of pressed powder into oily areas once or twice throughout the day is sufficient. Avoid layering too much powder, as it can lead to a cakey or heavy look.
Final Thoughts
The journey to finding the perfect setting powders and sprays for melanin-rich skin can often feel like an uphill battle, fraught with products that promise “translucence” but deliver ashiness, or “long-wear” that results in flashback. If you’ve experienced these frustrations, please know that it is not a reflection of your beauty or your makeup skills. It is, rather, an indictment of a beauty industry that has historically overlooked the unique and exquisite needs of deeper complexions.
At Black Beauty Basics, we believe that every woman deserves products and techniques that celebrate her natural radiance, not diminish it. With the insights shared in this guide – from understanding the nuances of tinted versus “translucent” powders, to mastering strategic application and the power of setting sprays – you are now equipped to navigate this final, crucial step of your makeup routine with confidence and discernment. Embrace the knowledge that the right products, applied with intention, will not only control shine and extend wear but will also enhance the inherent glow of your melanin-rich skin, ensuring you look flawless and vibrant in every light.
May this guide empower you to choose wisely and apply skillfully, allowing your makeup to serve as a testament to your beauty, rather than a source of frustration. We invite you to continue exploring our Makeup for Deep Skin Tones hub, where you can further connect your setting routine with foundational techniques, coverage solutions, and sculpting artistry, all designed to ensure your entire look is harmonized, long-lasting, and truly reflective of your magnificent self.
Related next steps
Related posts:
 The Best Makeup Setting Sprays for All-Day Radiance
 Setting Reasonable Heat Frequency and Temperature Limits: Finding Your Hair’s Sweet Spot
 Skin Type vs. Skin Condition on Melanin-Rich Skin: Unlocking Your Skin’s True Needs
 How to Read Your Undertone on Deep, Melanin-Rich Skin
 Layering Base Products for Everyday vs. Occasion Looks on Melanin-Rich Skin
 Bronzer and Dimension on Melanin-Rich Skin: Unlocking Your Natural Radiance