Application Techniques That Are Kinder to Breakouts and PIH
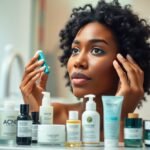
For many women with melanin-rich skin, the journey to clear, even-toned skin can be a complex one, often marked by the presence of breakouts and the lingering shadows of post-inflammatory hyperpigmentation (PIH). While a dedicated skincare regimen forms the bedrock of addressing these concerns, there are days when a little extra coverage provides a much-needed boost of confidence. However, the act of applying makeup itself can sometimes feel like a delicate dance, especially when navigating active breakouts, tender healing spots, or areas prone to PIH. The fear of exacerbating irritation, disrupting healing, or simply having foundation cling awkwardly to dry patches is a shared experience that can make the makeup routine feel more like a chore than an act of self-care.
This article is for you if you’ve ever felt that frustration – watching your carefully chosen foundation lift, separate, or highlight the very imperfections you’re trying to gently veil. We understand that coverage isn’t just about the product; it’s profoundly about the process. The way you touch your skin, the tools you employ, and the pressure you apply can make an immense difference in how your makeup looks, feels, and, crucially, how your skin responds. Our goal here is to empower you with gentle, effective makeup application techniques that honor the delicate nature of breakout-prone and PIH-affected skin, allowing you to achieve a smooth, unified complexion without compromising your skin’s health or healing journey.
We’ll delve into the nuances of touch, the strategic use of tools, and the art of building coverage with a light hand. This isn’t about achieving a “flawless” mask that erases every trace of your skin’s story, but rather about cultivating a mindful approach to makeup that supports your skin’s well-being while enhancing your natural beauty. By adopting these kinder techniques, you’ll discover that makeup can indeed be a comforting ally, providing the coverage you desire while respecting the intricate needs of your melanin-rich skin.
Why Technique Matters as Much as Product Choice
In the realm of makeup for melanin-rich skin, especially when dealing with acne and post-inflammatory hyperpigmentation (PIH), the spotlight often falls heavily on product selection. We meticulously research foundations, concealers, and primers, seeking out formulas that promise to be non-comedogenic, non-irritating, and perfectly matched to our unique undertones. While choosing the right products is undeniably critical – a topic we explore in depth in our guide on choosing foundation and concealer for acne-prone dark skin – it’s only half the equation. The other, equally vital, half lies in the application technique itself. The most skin-friendly foundation can still cause issues if applied with a heavy hand, dirty tools, or an aggressive motion. For skin that is already compromised by inflammation, active breakouts, or the delicate process of healing from PIH, the way makeup is applied can either be a soothing embrace or an aggravating assault.
Consider the delicate nature of an active breakout. It’s an area of inflammation, often tender to the touch, and susceptible to further irritation. Aggressive rubbing or dragging with a brush or sponge can not only exacerbate the inflammation but also potentially rupture the breakout, leading to increased bacterial spread, prolonged healing, and a higher likelihood of developing new PIH. Similarly, areas of PIH, while not actively inflamed, are still areas where the skin’s barrier might be slightly compromised or where new melanin is being produced in response to past trauma. Harsh application can stimulate further melanin production, making the PIH appear darker or extending its stay. The physical act of applying makeup, therefore, isn’t just about depositing color; it’s about interacting with the skin’s surface, its texture, and its underlying health.
Beyond the physical impact, technique also significantly influences the aesthetic outcome. Have you ever noticed foundation clinging to dry patches around a healing breakout, or appearing cakey and emphasizing texture rather than smoothing it? This is often a direct result of improper application. When product is dragged or buffed excessively over these areas, it can lift dry skin, settle into crevices, and create an uneven, unnatural finish. Conversely, a gentle, strategic application can seamlessly blend product, providing coverage without drawing undue attention to the very areas we wish to subtly camouflage. It allows the makeup to meld with the skin, creating a more natural, radiant appearance that doesn’t look or feel heavy. This mindful approach ensures that your makeup enhances your confidence without compromising the integrity of your skin or hindering its healing process.
The Interplay of Pressure, Direction, and Tool Choice
Understanding why technique is paramount involves breaking down its core components: pressure, direction, and tool choice. Each element plays a crucial role in how makeup interacts with your skin, particularly when dealing with sensitivities like acne and PIH.
Pressure: The Gentle Touch
The amount of pressure you apply is perhaps the most critical factor. For acne-prone and PIH-affected skin, a light, almost feather-like touch is non-negotiable. Heavy pressure can irritate active breakouts, potentially causing pain, worsening inflammation, or even leading to rupture. It can also push product into pores, contributing to future breakouts. When applying makeup over PIH, excessive pressure can stimulate melanocytes, the cells responsible for producing melanin, potentially making the dark spots appear more pronounced or prolonging their fading process. Think of your skin as a delicate canvas that requires gentle handling. The goal is to deposit product onto the surface, not to aggressively rub it in or disturb the skin beneath.
Direction: Patting vs. Dragging
The direction of your application motion is equally important. The common instinct might be to “buff” or “drag” foundation across the face, but this can be detrimental for sensitive skin. Dragging motions can pull and stretch the skin, especially around active lesions, which can be painful and damaging. It can also lift dry flakes around healing spots, creating an uneven texture. For areas with breakouts or PIH, a patting or stippling motion is far superior. This involves gently pressing the product onto the skin rather than sliding it across. This technique helps to deposit product evenly without disturbing the skin’s surface, ensuring better coverage and less irritation. It also prevents the makeup from settling into fine lines or emphasizing texture.
Tool Choice: The Right Implement for the Job
The tool you choose to apply your makeup—whether it’s a brush, sponge, or your fingertips—has a profound impact on how the product is distributed and how your skin is treated. Each tool offers different levels of control, coverage, and gentleness. For instance, a dense brush might offer more coverage but requires a very light hand to avoid irritation, while a damp beauty sponge can provide a sheerer, more skin-like finish with minimal friction. Using clean tools is also non-negotiable for acne-prone skin, as dirty tools can harbor bacteria and contribute to breakouts. We’ll delve deeper into specific tool choices and their optimal uses shortly, but suffice it to say, the right tool, used correctly, can transform your makeup application experience.
By mastering these elements – applying minimal pressure, using patting motions, and selecting appropriate, clean tools – you transform your makeup routine from a potential source of irritation into a gentle, skin-respecting ritual. This thoughtful approach not only safeguards your skin’s health but also yields a more natural, long-lasting, and beautiful finish, allowing your confidence to shine through.
Brushes, Sponges, and Fingertips: When Each May Work Best
The choice of application tool is a cornerstone of gentle makeup application for melanin-rich skin prone to breakouts and PIH. Each tool—brushes, sponges, and even your own fingertips—offers unique benefits and drawbacks, and understanding these can help you select the best approach for different areas of your face and varying coverage needs. The key is to leverage their strengths while mitigating their potential for irritation, always prioritizing a soft touch and impeccable hygiene.
The Art of the Brush: Precision and Control
Makeup brushes come in a vast array of shapes, sizes, and densities, each designed for a specific purpose. For acne-prone and PIH-affected skin, the type of brush and how it’s used are paramount. Generally, softer, less dense brushes are preferred for overall foundation application, while smaller, more precise brushes are excellent for targeted spot concealing. The bristles themselves should be soft and flexible, avoiding anything stiff or scratchy that could drag or irritate the skin.
Foundation Brushes: For Even, Controlled Coverage
When applying foundation with a brush, opt for a flat-top kabuki brush or a stippling brush. These brushes are designed to press and stipple product onto the skin rather than buffing it aggressively. A stippling brush, with its duo-fiber bristles (a mix of long and short), is particularly adept at creating a sheer to medium, airbrushed finish with minimal friction. You can Shop foundation brush gentle stippling on Amazon.
- Strengths: Brushes offer excellent control over product placement and can build coverage precisely. They tend to absorb less product than sponges, which can be more economical. For areas with PIH, a brush can help to layer product without disrupting underlying layers.
- Caution Points: Brushes, especially denser ones, can be more abrasive if used with too much pressure or a dragging motion. They require diligent cleaning to prevent bacterial buildup.
- Best Use: Ideal for applying liquid or cream foundations with a stippling or pressing motion. Excellent for building light to medium coverage evenly across the face, avoiding sensitive areas with active breakouts initially.
Concealer Brushes: Targeted Spot Treatment
For spot concealing active breakouts or stubborn PIH, small, flat, synthetic concealer brushes are invaluable. Their precise tips allow for targeted application directly onto the imperfection without disturbing the surrounding skin. A small, fluffy blending brush can then be used to gently diffuse the edges of the concealed spot.
- Strengths: Unmatched precision for spot concealing. Allows for controlled layering of product exactly where needed.
- Caution Points: Can look cakey if too much product is applied or not blended properly. Requires a very light hand to avoid irritating blemishes.
- Best Use: Applying a small amount of concealer directly onto individual breakouts or dark spots. Use a patting motion to press the product into the skin, then gently tap the edges to blend.
The Embrace of the Sponge: Seamless Blending and Sheer Finishes
Beauty sponges, particularly the popular tear-drop shaped varieties, have become a staple for many, and for good reason. When used damp, they offer a unique way to apply and blend makeup, often resulting in a very natural, skin-like finish. The dampness helps to sheer out product and provides a cooling sensation, which can be comforting on irritated skin. You can Shop makeup sponge sensitive acne prone skin on Amazon.
| Tool Type | Strengths for Acne/PIH Skin | Caution Points for Acne/PIH Skin |
|---|---|---|
| Damp Beauty Sponge |
|
|
| Soft Stippling/Kabuki Brush |
|
|
| Fingertips |
|
|
Damp Sponge Application: The Bouncy Blend
The key to using a beauty sponge effectively is to ensure it is damp, not soaking wet. Squeeze out all excess water after wetting it under the tap. This expands the sponge, making it softer and preventing it from absorbing too much product. Use a gentle bouncing or dabbing motion to press foundation or concealer onto the skin.
- Strengths: Sponges provide a very gentle, bouncy application that minimizes friction. They excel at creating a seamless, airbrushed finish and pressing product into the skin for long-lasting wear. The dampness helps to sheer out thicker formulas, making them less likely to look heavy or cakey.
- Caution Points: Sponges are highly porous and can harbor bacteria if not cleaned meticulously after every use. They also tend to absorb more product than brushes, which can be a consideration for product longevity.
- Best Use: Ideal for applying liquid or cream foundations and concealers over larger areas. Perfect for blending out the edges of concealer and for pressing setting powder gently into the skin.
The Warmth of Fingertips: Intuitive and Natural
Sometimes, the simplest tools are the most effective. Your clean fingertips can be surprisingly versatile for makeup application, especially for those who prefer a very natural, sheer finish. The warmth of your fingers helps to melt cream and liquid products into the skin, allowing for a seamless blend.
Fingertip Application: The Personal Touch
Before using your fingertips, ensure they are scrupulously clean. Wash your hands thoroughly with soap and water. Apply a small amount of product to the back of your hand or directly onto your fingertips, then use a gentle patting or tapping motion to apply it to your face.
- Strengths: Fingertips offer excellent control over product amount and placement. The warmth helps to melt product into the skin, creating a very natural, skin-like finish. It’s also an accessible, no-cost option.
- Caution Points: Can transfer oils and bacteria from your hands to your face if not perfectly clean. Less precise for intricate spot concealing compared to a small brush. Can absorb product into the skin of your fingertips, leading to uneven application if not careful.
- Best Use: Best for applying tinted moisturizers, BB/CC creams, or very sheer foundations. Also effective for warming up and blending cream blushes or highlighters. For very sensitive areas, a light pat with a clean finger can be the gentlest option.
Ultimately, the best tool is the one that feels most comfortable and effective for you, always keeping in mind the principles of gentleness and hygiene. Many find a combination of tools works best: a brush for initial application, a damp sponge for blending, and fingertips for a final touch-up or sheer product application. The goal is to minimize friction, prevent irritation, and achieve a beautiful, natural finish that respects your skin’s unique needs.
Gentler Motions for Breakout-Prone and Healing Areas
When your skin is contending with active breakouts or the delicate process of healing from post-inflammatory hyperpigmentation (PIH), the way you move your makeup tools across your face becomes paramount. Aggressive rubbing, dragging, or excessive buffing can not only irritate sensitive skin but also disrupt the healing process, spread bacteria, and ultimately make your makeup look less natural and more prone to caking. The secret to achieving coverage without exacerbating these issues lies in mastering a series of gentle, deliberate motions: patting, stippling, light pressing, and focused spot concealing. These techniques prioritize skin health while still allowing you to achieve the desired level of coverage and a seamless finish.
The Power of Patting: Depositing Without Disturbing
Patting is arguably the most fundamental and universally beneficial motion for applying makeup to breakout-prone and PIH-affected skin. Instead of sweeping or rubbing, patting involves gently pressing your tool (whether it’s a damp sponge, a soft brush, or your clean fingertip) onto the skin, lifting it, and then pressing again in an adjacent area. This motion is less about blending through friction and more about depositing product evenly onto the skin’s surface.
Why Patting Works:
- Minimizes Friction: By lifting the tool between each press, you drastically reduce the friction on the skin. This is crucial for active breakouts, which can be painful and easily irritated by rubbing. For PIH, reduced friction means less potential for stimulating melanocytes and worsening discoloration.
- Even Product Distribution: Patting allows for a more controlled and even distribution of product. Instead of pushing product around, you’re gently stamping it onto the skin, ensuring consistent coverage without streaks or patchiness.
- Prevents Lifting: When foundation or concealer is applied with a patting motion, it adheres better to the skin and is less likely to lift off or separate, especially over textured areas like healing breakouts or dry patches.
- Builds Coverage Naturally: Patting allows you to build coverage in thin layers, which is key to avoiding a cakey appearance. Each gentle pat adds a little more product, letting you customize the opacity without overloading the skin.
How to Execute Patting:
Dispense a small amount of liquid or cream product onto the back of your hand. Pick up a small amount with your chosen tool (damp sponge or soft brush). Starting from the center of your face and working outwards, gently press the tool onto your skin, lift, and then press again, slightly overlapping the previous area. For areas with active breakouts or PIH, be extra gentle, focusing on the immediate area and blending outwards with the lightest possible touch.
Stippling: The Airbrushed Effect with a Gentle Touch
Stippling is a specialized form of patting, often performed with a duo-fiber stippling brush. This technique uses the tips of the brush bristles to dot and press product onto the skin, creating an airbrushed, diffused finish. The unique design of a stippling brush allows for a very light application of product, making it ideal for sensitive skin.
Why Stippling Works:
- Sheer to Medium Coverage: Stippling provides buildable coverage that looks incredibly natural, mimicking the texture of skin. It prevents product from settling into pores or lines.
- Minimal Disturbance: Similar to patting, the stippling motion involves very little dragging, thus minimizing irritation to breakouts and PIH. The soft tips of the bristles gently deposit product without harsh friction.
- Diffused Finish: The technique helps to blend the product seamlessly into the skin, avoiding harsh lines or edges, which is particularly beneficial when trying to blend coverage over textured areas.
How to Execute Stippling:
Apply a small amount of liquid or cream foundation to the back of your hand. Dip the tips of your stippling brush into the product, picking up a very small amount. Gently tap or “stipple” the brush onto your face in small, circular motions, or simply press and lift. Focus on building coverage gradually, especially over areas of concern. For areas with active breakouts, use an even lighter touch, almost floating the brush over the surface.
Light Pressing: Setting and Refining
Beyond foundation and concealer, light pressing is a crucial technique for applying setting powders or even for simply ensuring your liquid products are fully absorbed and adhered to the skin. This motion is often performed with a damp sponge or a soft powder puff.
Why Light Pressing Works:
- Sets Makeup Without Dislodging: When applying setting powder, light pressing helps to fuse the powder with the liquid layers beneath, locking everything in place without disturbing the coverage you’ve already built.
- Minimizes Texture: Gently pressing powder onto the skin can help to blur the appearance of pores and fine lines, creating a smoother finish without emphasizing dry patches around breakouts.
- Controls Shine: For oily skin types, light pressing of powder can effectively absorb excess oil and reduce shine throughout the day, which is important as oil can sometimes exacerbate breakouts.
How to Execute Light Pressing:
After applying your liquid or cream base, take a small amount of translucent setting powder on a damp sponge or a soft powder puff. Gently press the sponge/puff onto your skin, focusing on areas prone to shine or where you want extra longevity. Avoid swiping or rubbing, as this can dislodge your foundation and create patchiness. For areas with active breakouts, use an extremely light touch, just enough to set the product without adding pressure.
Focused Spot Concealing: The Art of Precision
Spot concealing is where precision truly shines. Instead of applying a thick layer of concealer over a large area, the goal is to apply a tiny amount exactly where it’s needed, then blend only the edges. This prevents a cakey look and keeps the focus on the surrounding clear skin.
Why Focused Spot Concealing Works:
- Targeted Coverage: It addresses individual imperfections without adding unnecessary product to clear skin, resulting in a more natural finish.
- Prevents Over-Application: By applying concealer only to the spot, you avoid the common mistake of using too much product, which can draw more attention to the area.
- Minimizes Irritation: A small, precise brush allows you to work around the edges of a breakout or PIH spot with minimal contact, reducing the risk of irritation.
How to Execute Focused Spot Concealing:
- Choose the Right Concealer: Select a full-coverage, non-comedogenic concealer that matches your skin tone or is slightly warmer to counteract the coolness of PIH.
- Small Brush, Small Amount: Use a tiny, flat, synthetic concealer brush. Pick up a minuscule amount of product.
- Dab Directly: Gently dab the concealer directly onto the center of the breakout or the darkest part of the PIH spot. Avoid spreading it outwards yet.
- Pat to Blend Edges: Using a clean, small, fluffy blending brush, or the clean edge of a damp sponge, gently tap and feather the very edges of the concealer to blend it seamlessly into the surrounding foundation. Do not rub the center of the concealed spot.
- Set (Optional): If desired, lightly press a tiny amount of translucent setting powder over the concealed area with a clean fingertip or a very small, soft brush to lock it in place.
By integrating these gentle motions into your daily routine, you transform makeup application into a nurturing act. You’ll find that your makeup not only looks better – smoother, more natural, and less prone to caking – but your skin will also thank you for the reduced irritation and enhanced opportunity to heal. This thoughtful approach is a testament to the fact that beauty and skin health can, and should, coexist harmoniously.
How to Build Coverage Without Overworking the Skin
Achieving adequate coverage for breakouts and PIH without resorting to heavy, cakey layers or irritating the skin further is an art form. The key lies in understanding the principle of “less is more” and building coverage strategically, rather than applying a thick layer all at once. Overworking the skin with too much product or excessive blending can lead to a host of problems: foundation lifting, clinging to dry patches, emphasizing texture, and most importantly, exacerbating irritation or disrupting the healing process. For melanin-rich skin, which can sometimes be more prone to PIH, a gentle and deliberate approach is not just a preference, but a necessity. This section will guide you through the process of building coverage effectively while honoring your skin’s delicate state.
The Foundation of Success: Thin Layers
The cardinal rule for building coverage on sensitive or textured skin is to apply products in thin, sheer layers. Think of it like painting: you wouldn’t slather on a thick coat of paint; you’d build up the color with multiple thin applications. This approach allows for greater control, prevents a heavy look, and ensures that each layer has a chance to meld with the skin.

Why Thin Layers Work:
- Natural Finish: Thin layers look more like skin and less like makeup. They allow your natural skin texture to show through subtly, avoiding a flat, mask-like appearance.
- Reduced Caking: When products are applied thinly, they are less likely to settle into fine lines, pores, or cling to dry patches around breakouts, which are common issues with thicker applications.
- Better Adherence: Each thin layer has a better chance to properly adhere to the skin, leading to longer-lasting wear without creasing or separating.
- Less Irritation: Applying less product means less need for aggressive blending, significantly reducing the potential for friction and irritation on delicate areas.
How to Apply Thin Layers:
- Start with Minimal Product: Dispense a pea-sized amount of foundation onto the back of your hand. It’s always easier to add more than to take away.
- Distribute Evenly: Using your chosen tool (damp sponge, stippling brush, or clean fingertips), pick up a small amount of product.
- Apply in Sections: Instead of applying foundation to your entire face at once, work in small sections (e.g., forehead, nose/cheeks, chin). This allows you to focus on blending each area before the product dries.
- Pat, Don’t Rub: Using the gentle patting or stippling motions discussed earlier, lightly press the product onto your skin. Blend outwards from the center of your face, where you typically need the most coverage.
- Assess and Repeat: After the first thin layer, step back and assess your coverage. If more is needed, apply another equally thin layer only to the areas that require it, rather than reapplying to your entire face.
Strategic Spot Concealing: The Precision Approach
Once your initial thin layer of foundation is applied, the next step is to address any remaining areas of concern with targeted spot concealing. This is where you bring in your concealer to specifically cover active breakouts or prominent PIH spots that the foundation couldn’t fully obscure. The key here is precision and minimal product.
Techniques for Strategic Spot Concealing:
- Choose the Right Shade and Formula: Select a concealer that closely matches your foundation shade or is slightly warmer for PIH. Opt for a creamy, full-coverage, non-comedogenic formula.
- Pinpoint Application: Use a very small, flat, synthetic brush (like an eyeliner brush or a small lip brush) to pick up a tiny dot of concealer. Gently dab this dot directly onto the center of the blemish or the darkest part of the PIH spot. The goal is to cover only the discoloration, not the surrounding skin.
- Feather the Edges: With a clean, small, fluffy blending brush or the clean edge of a damp sponge, very lightly tap and feather the edges of the concealer. The aim is to seamlessly blend the concealer into the surrounding foundation without disturbing the product directly over the blemish. Avoid rubbing or dragging the center of the concealed spot.
- Minimal Blending: Blend only as much as necessary to diffuse the edges. Over-blending will remove the coverage you just applied.
- Layer if Needed: If the spot is still visible, allow the first layer of concealer to set for a minute, then repeat the pinpoint application with another tiny dot, again blending only the edges.
Setting with a Light Hand: Locking It In
Once you’ve achieved your desired coverage, setting your makeup is crucial for longevity, especially for oily or acne-prone skin. However, this step also requires a gentle touch to avoid disturbing the layers you’ve meticulously built.
Setting Techniques for Sensitive Skin:
- Translucent Powder is Your Friend: Opt for a finely milled, translucent setting powder. Colored powders can sometimes add an extra layer of coverage that might look heavy or alter your foundation shade.
- Damp Sponge or Soft Puff: Use a clean, damp beauty sponge or a very soft, velvety powder puff. These tools allow for a gentle pressing motion that fuses the powder with your liquid makeup.
- Press, Don’t Swipe: Lightly pick up some powder with your tool, tap off any excess, and then gently press the powder onto your skin. Focus on areas prone to shine (T-zone) or where you want extra longevity. Avoid swiping or rubbing, as this can dislodge your foundation and concealer.
- Bake Strategically (If Needed): If you prefer to “bake” under your eyes or around the mouth, do so sparingly and for a very short duration (1-2 minutes). Use a damp sponge to press a generous amount of powder, let it sit, then gently dust off the excess with a very soft, fluffy brush. Avoid baking over active breakouts or very dry areas, as this can emphasize texture.
- Setting Spray: A hydrating setting spray can help melt all the layers together, creating a more skin-like finish and reducing any powdery appearance. Hold the bottle at arm’s length and mist evenly over your face.
By embracing thin layers, strategic spot concealing, and gentle setting techniques, you empower yourself to achieve a beautifully even and confident complexion without compromising the health or comfort of your melanin-rich skin. This mindful approach ensures that your makeup works with your skin, not against it, allowing your natural radiance to shine through.
Makeup Tool Hygiene and Why It Matters for Acne-Prone Skin
For individuals with acne-prone and sensitive melanin-rich skin, makeup tool hygiene is not merely a suggestion; it is an absolute imperative. The tools we use to apply makeup—brushes, sponges, and even our fingertips—can quickly become breeding grounds for bacteria, yeast, and mold if not cleaned regularly and thoroughly. When these contaminated tools come into contact with the skin, especially over active breakouts or compromised skin barriers, they can introduce harmful microorganisms, leading to new breakouts, worsening existing inflammation, and potentially prolonging the healing of post-inflammatory hyperpigmentation (PIH). Neglecting tool hygiene can undermine even the most meticulous skincare routine and the most carefully chosen non-comedogenic makeup products.
The Hidden Dangers of Dirty Tools
Imagine applying your skincare, diligently cleansing, toning, and moisturizing, only to then use a brush that’s been sitting on your vanity for weeks, accumulating dust, dead skin cells, and residual makeup. This brush, now a microbial cocktail, is then swept across your face, depositing all those unwanted elements directly into your pores and onto your delicate skin. The implications for acne-prone skin are profound:
- Bacterial Contamination: Our skin naturally harbors bacteria, and makeup tools pick up these bacteria, along with those from our environment and the makeup products themselves. Propionibacterium acnes (now Cutibacterium acnes), the primary bacteria associated with acne, can thrive on dirty tools and be reintroduced to the skin, triggering new inflammatory lesions.
- Clogged Pores: Dirty brushes and sponges accumulate old makeup, oil, and dead skin cells. When pressed against the skin, these residues can transfer back, contributing to clogged pores, which are the precursors to blackheads, whiteheads, and inflamed pimples.
- Irritation and Inflammation: The friction from dirty, stiff bristles or sponges can physically irritate already sensitive or inflamed skin. This irritation can exacerbate existing breakouts, cause redness, and potentially lead to micro-tears in the skin barrier, making it more vulnerable to infection and further inflammation.
- Spread of Infection: If you have an active, open breakout, using a dirty tool can directly introduce bacteria into the wound, leading to secondary infections or worsening the existing lesion. This can also prolong healing and increase the likelihood of PIH.
- Reduced Product Performance: Beyond skin health, dirty tools don’t perform as well. Brushes become stiff and clumpy, and sponges lose their bounce, making smooth, even application difficult. This can lead to cakey, streaky makeup that doesn’t blend seamlessly.
Establishing a Robust Cleaning Routine
The good news is that maintaining makeup tool hygiene is a straightforward process that, once integrated into your routine, becomes second nature. The frequency of cleaning depends on the tool and how often it’s used, but a general rule of thumb is: the more frequently you use it, especially on liquid or cream products, the more often it needs cleaning.
Daily Spot Cleaning (for brushes and sponges used with liquids/creams):
For tools used daily with liquid foundation, concealer, or cream products, a quick spot clean after each use is highly recommended. This prevents product buildup and helps to keep bacteria at bay between deeper washes.
- How To: Spray a brush cleaning spray onto a paper towel or directly onto the brush bristles/sponge. Gently swirl the brush or dab the sponge onto the paper towel until no more makeup comes off. Allow to air dry completely before next use.
- Recommended Products: Look for alcohol-free brush cleansers that won’t dry out bristles.
Deep Cleaning (Weekly to Bi-Weekly):
All brushes and sponges should undergo a thorough deep clean regularly. For those with acne-prone skin, weekly deep cleaning for foundation and concealer tools is ideal. For powder brushes, bi-weekly might suffice.
- Wet the Bristles/Sponge: Hold the brush bristles-down under lukewarm running water. Avoid getting water into the ferrule (the metal part that connects the bristles to the handle) as this can loosen the glue over time. For sponges, thoroughly saturate with water.
- Apply Cleanser: Dispense a small amount of gentle brush shampoo, mild soap (like baby shampoo), or a dedicated brush cleanser into the palm of your hand or onto a textured brush cleaning mat. You can Shop brush cleanser makeup tools acne prone skin on Amazon.
- Lather and Swirl: Gently swirl the brush bristles in the cleanser, working up a lather. For sponges, gently squeeze and release under running water with the cleanser until it lathers.
- Rinse Thoroughly: Rinse the brush or sponge under lukewarm running water, again with bristles/sponge facing down, until the water runs clear and no more product or suds remain.
- Squeeze Out Excess Water: Gently squeeze out any excess water from the bristles or sponge. Reshape brush bristles if needed.
- Air Dry: Lay brushes flat on a clean towel or hang them bristles-down using a brush drying rack. Allow sponges to air dry in a well-ventilated area. Ensure they are completely dry before storing or using again to prevent mold and mildew growth.
Fingertip Hygiene:
If you use your fingertips for application, ensure your hands are thoroughly washed with soap and water before touching your face or makeup products. This simple step prevents the transfer of bacteria and oils from your hands to your skin.
Storage Matters:
Store your clean, dry tools in an upright position (brushes) or in a breathable container (sponges) that protects them from dust and airborne contaminants. Avoid storing them in damp, enclosed spaces like makeup bags immediately after cleaning, as this can encourage bacterial growth.
By committing to a consistent and thorough makeup tool hygiene routine, you create a cleaner, safer environment for your skin. This proactive measure not only helps to prevent new breakouts and reduce inflammation but also ensures that your makeup application is always smooth, seamless, and kind to your melanin-rich skin, supporting its journey towards health and radiance.
Frequently Asked Questions
Can I use my fingers to apply foundation if I have acne?
Yes, you can use clean fingertips to apply foundation, especially for a sheer, natural finish. The warmth from your fingers can help melt the product into the skin for a seamless blend. However, always ensure your hands are thoroughly washed with soap and water immediately before application to avoid transferring bacteria and oils to your face.
How do I prevent my foundation from clinging to dry patches around breakouts?
To prevent foundation from clinging to dry patches, ensure your skin is well-hydrated and prepped with a gentle moisturizer and primer before makeup. Apply foundation in thin, patting layers, avoiding aggressive rubbing. Using a damp beauty sponge can also help to press the product into the skin without emphasizing dry areas.
What’s the best way to conceal an active, inflamed breakout without irritating it further?
For an active, inflamed breakout, use a small, flat, synthetic concealer brush to dab a tiny amount of full-coverage, non-comedogenic concealer directly onto the center of the blemish. Gently tap only the edges of the concealer with a clean, small fluffy brush or the clean edge of a damp sponge to blend, avoiding the inflamed center as much as possible.
Should I use a brush or a sponge for applying foundation on PIH?
Both a soft stippling brush and a damp beauty sponge can work well for PIH, depending on your desired finish. A stippling brush allows for precise, buildable coverage with gentle patting motions, while a damp sponge provides a seamless, airbrushed look. The key is to use light, pressing motions rather than dragging, regardless of the tool.

How often should I clean my makeup brushes and sponges if I have acne-prone skin?
For acne-prone skin, it’s highly recommended to spot clean brushes and sponges used with liquid/cream products daily after each use. A thorough deep clean should be performed weekly for foundation and concealer tools, and bi-weekly for powder brushes, to prevent bacterial buildup.
Is it better to use liquid or powder foundation over breakouts?
Liquid foundations, especially those labeled non-comedogenic and oil-free, are often preferred over breakouts as they can be more hydrating and less likely to settle into texture. If using powder, opt for a finely milled translucent setting powder applied with a light pressing motion to set liquid products, rather than a heavy powder foundation which can sometimes emphasize texture.
Can makeup application worsen my PIH?
Improper makeup application can potentially worsen PIH by causing further irritation or stimulating melanin production if you rub or drag products aggressively. However, using gentle patting motions, clean tools, and non-irritating products, as outlined in this guide, helps to protect your skin and allows you to cover PIH without hindering its healing process.
Where to Go Next
Mastering the art of gentle makeup application is a significant step in caring for your melanin-rich skin, especially when navigating the challenges of breakouts and PIH. By adopting these kinder techniques, you’re not just applying makeup; you’re nurturing your skin’s health and boosting your confidence with every mindful touch. Remember, your beauty journey is a holistic one, encompassing both thoughtful skincare and intelligent makeup choices.
To further empower your routine, we encourage you to explore other essential resources within our Black Beauty Basics community. Understanding the full spectrum of how makeup interacts with your skin is crucial. Dive deeper into Acne and Makeup Integration: Coverage Without Worsening Skin, our comprehensive cluster hub, which provides a wealth of knowledge on this delicate balance. From there, you can explore the foundational steps of pre-makeup skin prep for acne-prone melanin-rich skin, ensuring your canvas is always ready for a flawless, irritation-free application. And don’t forget the importance of the final step: gentle but thorough makeup removal on dark, sensitive skin, which is just as critical as application for maintaining clear skin.
For a broader understanding of acne and sensitive skin in Black women, our parent pillar on acne and sensitive skin in Black women offers a wealth of information, from understanding the causes to building effective skincare routines. You might also find invaluable insights in how to add actives without overwhelming PIH-prone skin, which delves into integrating powerful ingredients safely, and our guide on prevention of scarring and PIH after acne, which equips you with strategies to minimize post-acne marks. By continuously learning and adapting your approach, you empower yourself to navigate your unique skin journey with grace, confidence, and radiant results.
INTERNAL LINKING OPPORTUNITIES
Acne and Makeup Integration: Coverage Without Worsening Skin
acne and sensitive skin in Black women
pre-makeup skin prep for acne-prone melanin-rich skin
choosing foundation and concealer for acne-prone dark skin
gentle but thorough makeup removal on dark, sensitive skin
how to add actives without overwhelming PIH-prone skin
prevention of scarring and PIH after acne
Related next steps
Related posts:
 Everyday Habits That Reduce Scarring and PIH After Breakouts
 Unlock Radiant Skin: A Deep Dive into BeautyStat Universal C Skin Refiner SPF50 – Benefits, Ingredients, and Application Tips
 Detangling Techniques – Tools and Methods to Prevent Breakage
 The Benefits of Scalp Massages – Techniques to Stimulate Growth
 The Lip Care Pre-Game: How to Exfoliate & Moisturize for Flawless Lipstick Application
 Eyeliner for Hooded Eyes – Tips and Techniques That Actually Work