How to Cover Hyperpigmentation and Dark Circles on Dark Skin
For many Black women, the journey to a flawless complexion often encounters unique challenges that standard beauty advice rarely addresses. We know the reality: those stubborn acne marks that linger long after the blemish is gone, the shadowy whispers of razor bumps, or the deeper pigmentation around the mouth and jawline that can make our skin tone appear uneven. Then there are the dark circles – sometimes a hereditary gift, sometimes a sign of a busy life – that can cast a blue-purple or deep brown hue beneath our eyes, creating an unintended focal point. These are not flaws, but simply characteristics of our melanin-rich skin, which responds to inflammation and environmental factors with a beautiful, yet sometimes challenging, depth of color.
The frustration is real when you try to address these areas with conventional makeup. You’ve likely experienced it: applying a concealer that promises to brighten, only for it to turn an unsettling ashy gray, leaving you with “reverse panda eyes” that draw more attention than they conceal. Or perhaps the shade looks perfect initially, only to oxidize into an orange mess or simply vanish by midday, leaving your hyperpigmentation peeking through as if you never applied a thing. These common mishaps aren’t a reflection of your makeup skills, but rather a glaring oversight in mainstream beauty education that often fails to account for the nuances of deep, melanin-rich complexions.
This guide is designed to empower you with the precise knowledge and techniques needed to navigate these challenges with confidence and grace. We understand that your skin is not a blank canvas, but a vibrant tapestry of tones and undertones that requires a thoughtful, tailored approach. We’re going to demystify the art of achieving smooth, believable coverage that still looks like *your* skin, focusing on a powerful, three-step sequence: correct, conceal, and set. This method is specifically adapted for deep skin, ensuring that you use less product overall while achieving a more harmonious and lasting finish, avoiding the pitfalls of ashiness and cakiness.
Before we dive into the intricate steps, remember that a strong foundation (pun intended!) for any makeup application begins with understanding your unique complexion. Knowing your undertone is paramount to selecting the right shades that will truly enhance, rather than clash with, your skin. We highly recommend consulting our comprehensive undertone guide for Black women to pinpoint your specific warmth or coolness. Furthermore, integrating these techniques into a well-chosen base routine, informed by our foundation guide for deep skin tones and our broader Makeup for Deep Skin Tones hub, will elevate your entire look, ensuring seamless integration and a truly radiant outcome.
Why Hyperpigmentation Shows up Differently on Deep Skin
Hyperpigmentation and dark circles are universal concerns, but their manifestation and the most effective ways to address them are distinctly different for those with deep, melanin-rich skin. Our skin, abundant in melanin, is a marvel, offering natural protection and a stunning range of hues. However, this very abundance means that when our skin experiences inflammation, trauma, or sun exposure, the melanocytes (the cells responsible for producing melanin) can go into overdrive, depositing excess pigment. This results in post-inflammatory hyperpigmentation (PIH) from acne, ingrown hairs, or even minor scratches, and can also contribute to genetic dark circles.
For deep skin tones, these areas of discoloration often present as shades of deep brown, blue-purple, or even a grayish cast, rather than the red or light brown tones seen on lighter complexions. This contrast against our natural skin tone can make these areas appear more pronounced and challenging to neutralize. The underlying issue is that many conventional makeup products and techniques are formulated and taught with lighter skin tones in mind, where a simple lighter concealer might suffice. On deep skin, applying a light-toned concealer directly onto a blue-purple or deep brown area without prior correction often leads to that dreaded ashy or gray appearance. The light pigment of the concealer mixes with the dark, cool-toned discoloration, creating a desaturated, dull, and unnatural effect, rather than a brightened, even one. This is why understanding the specific color theory for deep skin is not just helpful, but absolutely essential.
Common hyperpigmentation patterns on deep skin often include:
- Around the mouth and chin: This area can naturally be darker for many Black women, often exacerbated by hormonal changes, sun exposure, or irritation from shaving or waxing.
- Jawline and cheeks: These areas are frequently affected by post-inflammatory hyperpigmentation from acne breakouts, leaving behind stubborn dark spots that can take months or even years to fade naturally.
- Forehead: Sun exposure, hormonal shifts, and acne can also lead to patches of hyperpigmentation on the forehead, sometimes presenting as melasma.
- Neck and décolletage: While often overlooked, these areas can also show signs of hyperpigmentation, particularly from sun exposure or friction.
When it comes to dark circles, they can manifest in several ways on deep skin:
- Brown hyperpigmentation: This is often a result of excess melanin production in the delicate under-eye skin, either genetically inherited or due to sun exposure and irritation. It appears as a deeper brown or almost black shadow.
- Blue-purple shadows: For some, the thin skin under the eyes allows underlying blood vessels to show through, creating a bluish or purplish tint. This is more common with thinner skin or less subcutaneous fat.
- Hollows and shadows: Anatomical structure, such as deep-set eyes or a loss of volume in the tear trough area, can create natural shadows that appear darker, regardless of pigmentation.
Each type of discoloration requires a slightly different approach, but the foundational principle remains the same: neutralize the unwanted color before attempting to lighten or conceal it. This is the cornerstone of effective coverage on deep skin.
Correct Before You Conceal
The golden rule for achieving truly seamless coverage on deep skin, especially when dealing with hyperpigmentation and dark circles, is to *correct before you conceal*. This sequence is not merely a suggestion; it’s a fundamental principle rooted in color theory that prevents the common pitfalls of ashiness, grayness, and inadequate coverage. Think of it like this: if you have a deep blue wall and you want to paint it a light beige, you wouldn’t just apply beige paint directly. You’d first prime it with a neutralizer to cancel out the strong blue, then apply your desired color. The same logic applies to your skin.
Color correction involves using a color from the opposite side of the color wheel to neutralize an unwanted tone. For deep skin, where discoloration often presents as blue, purple, or deep brown, simply applying a skin-toned concealer on top will not effectively cancel these undertones. Instead, the concealer will mix with the discoloration, resulting in a dull, ashy, or grayish cast. By first applying a corrector, you effectively “erase” the unwanted color, creating a more neutral base for your concealer to work on. This allows your concealer to perform its primary function – to match your skin tone and provide coverage – without having to fight against an underlying color challenge. The result is a brighter, more even, and natural-looking finish that requires less product and lasts longer.
Choosing Corrector Colors for Deep Skin
Selecting the right color corrector is the most critical step in this process. For deep skin tones, the most effective correctors will fall within the peach, orange, or brick red spectrum. The specific shade you choose depends on the depth of your skin tone and the intensity and type of your discoloration.
- Peach Correctors: These are ideal for lighter to medium-deep skin tones with mild to moderate blue-purple or brownish discoloration. A soft peach can brighten and neutralize without being too heavy. It’s a good starting point if your dark circles aren’t extremely deep or if your hyperpigmentation is a lighter brown.
- Orange Correctors: As the discoloration becomes deeper and more pronounced, particularly for medium-deep to deep skin tones, an orange corrector becomes indispensable. Orange is directly opposite blue on the color wheel, making it incredibly effective at neutralizing blue-purple undertones in dark circles. It also works wonders on deeper brown hyperpigmentation that has a cooler, almost grayish cast. The key is to choose an orange that isn’t too bright or neon, but rather a rich, warm, almost terracotta orange.
- Brick Red/Deep Orange-Red Correctors: For the deepest skin tones and the most intense hyperpigmentation or dark circles (those that appear almost black or very deep blue-purple), a brick red or deep orange-red corrector is your secret weapon. These rich, warm tones have the intensity needed to completely cancel out severe discoloration without making the area look ashy or dull. They provide the strongest neutralization power for the darkest spots and under-eye areas.
When choosing, consider your skin’s undertone as well. If your skin has a warmer, golden undertone, you might lean towards more golden-orange correctors. If you have a cooler, redder undertone, a slightly more reddish-orange or brick red might blend more seamlessly. The goal is to select a corrector that is vibrant enough to neutralize but not so stark that it’s difficult to cover with concealer.
The texture of your corrector also matters. Creamy, blendable formulas are generally preferred as they offer good coverage without being cakey. Avoid overly thick or dry formulas, especially for the delicate under-eye area, as they can settle into fine lines. You can shop a wide range of cream and liquid color correctors on Amazon to find your perfect shade and formula. Shop cream color corrector on Amazon.
Where and How Much to Correct
Precision and restraint are paramount when applying color corrector. The goal is not to paint your entire under-eye area or cover a large patch of skin, but rather to target only the areas of discoloration. Applying corrector too broadly or too heavily can make it difficult to conceal later and can lead to an unnatural finish.
For dark circles, focus the corrector directly on the darkest part of the under-eye area, which is typically along the tear trough and the inner corner, where the blue-purple or deep brown tones are most concentrated. You’ll often find this discoloration extends slightly outwards in a crescent shape. Apply the corrector only to these discolored areas, avoiding areas that are already your natural skin tone. A small, precise brush or your fingertip is ideal for this.
For hyperpigmentation, such as acne scars or dark spots, apply the corrector directly onto the center of each spot. If you have a larger patch of discoloration, like around the mouth or on the forehead, apply a thin layer only to the darkest parts of the patch. The key is to use a very thin layer. You are aiming to neutralize the color, not to completely obscure it with the corrector itself. A little goes a long way. Start with a tiny dot or a sheer wash and build up if necessary. Over-applying corrector is one of the quickest ways to create a heavy, cakey look that will be challenging to blend out later.
Blending Corrector on Melanin-Rich Skin
Once the corrector is applied, the blending technique is crucial for a seamless transition. The aim is to blend the edges of the corrector into your skin without moving the product from the area you’re trying to neutralize.
For under-eyes:
- Tap, don’t drag: Use your ring finger (which provides the most gentle pressure) or a small, dense synthetic brush to gently tap the corrector into the skin. The warmth of your finger can help melt the product for a smoother finish.
- Keep it localized: Concentrate your tapping motions within the boundaries of the discoloration. Avoid dragging the product outward, which can spread the orange or red tint to areas that don’t need it, making it harder to conceal.
- Let it sit: After tapping, allow the corrector to “set” for about 30 seconds to a minute. This allows the product to warm up and adhere to the skin, which can improve its longevity and prevent it from mixing too readily with your concealer.
- Sheer application: Remember, you want to neutralize, not create a new orange patch. The corrector should look like a sheer wash of color that subtly cancels out the darkness, not a thick layer.
For hyperpigmentation spots:
- Pinpoint blending: Use a very small, precise brush (like an eyeliner brush or a small concealer brush) or the tip of your pinky finger. Gently tap and feather the edges of the corrector into the skin surrounding the spot.
- Targeted approach: Ensure the bulk of the product remains on the dark spot itself. The goal is to make the spot appear more neutral, blending seamlessly into your natural skin tone, rather than creating an orange halo around it.
After blending, the discolored area should appear significantly less dark, perhaps a muted brown or a slightly peachy-brown, rather than its original blue-purple or deep brown. If it still looks too dark, you can apply another *very thin* layer, but always err on the side of less product. The next step, concealer, will perfect the match.
Choosing Concealers for Dark Skin (Shade, Undertone, and Formula)
Once you’ve expertly color-corrected, the next pivotal step is selecting the right concealer. This is where many tutorials fall short for deep skin, often recommending a “much lighter” shade that inevitably leads to ashiness or an unnatural, stark contrast. For melanin-rich skin, the choice of concealer shade, undertone, and formula is nuanced and critical for achieving a truly seamless, radiant finish.
The primary function of concealer after correction is to match your skin tone and provide additional coverage, not to lighten the area significantly. The brightening effect should come from the successful neutralization of the discoloration, allowing your natural skin tone to shine through.
Shade Rules for Under-Eyes vs Spots
The shade of concealer you choose will differ slightly depending on whether you’re covering dark circles or hyperpigmentation.
- For Under-Eyes: After correction, you want to apply a concealer that is one to two shades lighter than your foundation or natural skin tone. The key here is “one to two shades,” not dramatically lighter. This subtle difference provides a gentle brightening effect without creating a stark, unnatural contrast. The goal is to lift and illuminate the under-eye area, making you look more awake and refreshed, but still natural. If you go too light, especially after color correction, you risk creating a “reverse panda eye” effect or an artificial-looking highlight.
- For Hyperpigmentation and Dark Spots: For these areas, your concealer should be an exact match to your foundation or natural skin tone. Since you’ve already neutralized the discoloration with a corrector, the concealer’s job is simply to blend seamlessly with the rest of your complexion, making the spot disappear into your skin. Using a lighter shade on a dark spot will only draw attention to it, creating a noticeable light patch. A perfect match ensures the spot is covered without creating an artificial highlight or shadow.
It’s often beneficial to have two concealer shades: one slightly lighter for under-eyes and one that perfectly matches your skin for spots. This strategic approach ensures targeted and effective coverage for both concerns.
Undertone Matching to Avoid Ashiness
This is perhaps the most critical aspect of choosing concealer for deep skin, and it’s where many go wrong. Even if the shade depth is correct, the wrong undertone will lead to an ashy, gray, or muddy appearance. Remember the importance of our undertone guide for Black women? This is where that knowledge truly shines.
- Warm Undertones (Golden, Yellow, Olive): If your skin has a warm undertone, look for concealers with golden, yellow, or even peachy-golden undertones. These will harmonize with your natural complexion and prevent any grayness. Avoid concealers with cool (pink/red) or overly neutral undertones, as they can appear dull or ashy against your skin.
- Cool Undertones (Red, Blue-Red): If your skin has a cool undertone, seek concealers with subtle red, peach, or even a hint of blue-red undertone. These will complement your natural coolness and provide a vibrant, true-to-skin finish. Be wary of overly yellow or golden concealers, which can look unnatural or sallow on cool-toned deep skin.
- Neutral Undertones: If you have a neutral undertone, you have more flexibility. Look for concealers that balance both warm and cool pigments, often described as “neutral” or “balanced.” You might find that concealers with a slight peach or golden hint still work well to brighten without clashing.
The goal is for the concealer’s undertone to seamlessly blend with your skin’s natural undertone, creating a harmonious and natural finish. When swatching concealers, always do so on your face (not your hand) and allow it to dry down completely, as many concealers oxidize and change color.
Concealer Textures That Work on Deep Skin
The formula and texture of your concealer play a significant role in how it looks, feels, and lasts on deep skin.
- Creamy, Hydrating Formulas (for Under-Eyes): For the delicate under-eye area, especially after correction, opt for creamy, hydrating, and flexible formulas. These types of concealers are less likely to settle into fine lines, look cakey, or emphasize texture. They move with your skin, providing a smooth, natural finish. Look for ingredients like hyaluronic acid, glycerin, or nourishing oils. Avoid overly matte or thick formulas under the eyes, as they can appear dry and accentuate any creasing.
- Medium to Full Coverage (for Spots): For hyperpigmentation, you’ll want a concealer that offers medium to full coverage to effectively mask the neutralized spot. The texture can be slightly thicker than an under-eye concealer, but it should still be blendable. A satin or natural matte finish often works well for spots, as it provides good coverage without looking too heavy or shiny.
- Long-Wearing and Non-Creasing: Regardless of whether it’s for under-eyes or spots, seek out formulas that promise long wear and are non-creasing. This is particularly important for deep skin, as products that fade quickly can leave hyperpigmentation peeking through or under-eyes looking dull again.
- Liquid vs. Stick: Liquid concealers are generally more versatile and offer a wider range of finishes, from natural to full coverage. Stick concealers can be great for targeted spot coverage due to their precision and often higher pigment load, but ensure they are creamy enough not to drag or look heavy.
Remember, the best concealer is one that feels comfortable, looks natural, and effectively covers without drawing unwanted attention. Don’t be afraid to experiment with different brands and formulas. You can explore various liquid and cream concealers specifically formulated for deep skin tones on Amazon. Shop concealer for dark skin tones on Amazon.
Step-by-Step: Covering Dark Circles on Deep Skin
Conquering dark circles on deep skin requires a methodical approach that prioritizes hydration, precise color correction, and strategic concealment. This step-by-step guide will walk you through the process, ensuring a bright, natural, and lasting finish.
Prep the Under-Eye Area
Proper skin preparation is the unsung hero of flawless makeup, especially for the delicate under-eye area. Neglecting this step can lead to concealer creasing, looking dry, or not blending seamlessly.
Begin with a clean face. After cleansing and toning, apply your regular facial moisturizer, ensuring it’s fully absorbed. For the under-eye area specifically, a dedicated eye cream is highly recommended. Choose a hydrating, emollient eye cream that provides a good slip without being greasy. Gently tap a small amount of eye cream around your orbital bone and directly under your eyes using your ring finger. Allow it to fully absorb for at least 2-3 minutes before moving on. This step plumps the skin, reduces the appearance of fine lines, and creates a smooth canvas for your corrector and concealer, preventing them from looking cakey or settling into creases. If your under-eyes tend to be very dry, consider a hydrating primer specifically for that area.
Correct Under-Eye Darkness
This is the non-negotiable step for deep skin. As discussed, direct concealment without correction often leads to ashiness.
Select your peach, orange, or brick red corrector based on the intensity of your dark circles. For most deep skin tones with significant blue-purple or deep brown circles, an orange or deep orange/red corrector will be most effective. Using a small, precise brush (like a flat synthetic concealer brush) or your ring finger, pick up a tiny amount of product. Gently dab or tap the corrector directly onto the darkest areas of your under-eye circles. This usually includes the inner corner, along the tear trough, and any areas where the blue/purple/brown discoloration is most prominent. Avoid applying it to areas that are already your natural skin tone. The goal is to neutralize the unwanted color, not to paint a full orange mask. Blend the edges by gently tapping with your ring finger, ensuring the corrector remains localized to the discolored area. You should see the darkness visibly muted, transforming from blue/purple/deep brown to a more neutral, peachy-brown tone. Let the corrector set for about 30-60 seconds to allow it to adhere to the skin.
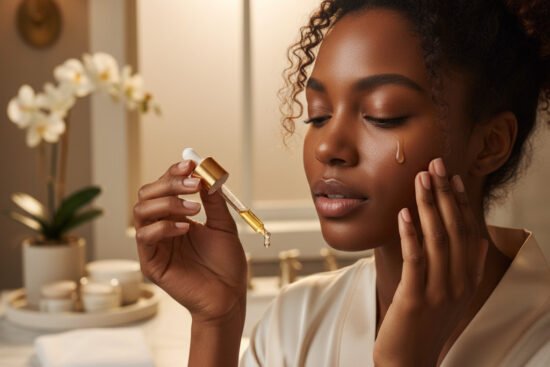
Apply and Blend Concealer
Now that the darkness is neutralized, it’s time to perfect and brighten with concealer.
Choose a concealer that is one to two shades lighter than your foundation and has an undertone that complements your skin (golden for warm, peachy/red for cool). Apply a small amount of concealer directly over the corrected area. You don’t need a lot; the corrector has done most of the heavy lifting. Start with a few dots or a thin line. Using a damp beauty sponge, a fluffy concealer brush, or your ring finger, gently tap and press the concealer into the skin. The tapping motion is crucial here, as it blends the product without disturbing the corrector underneath. Blend outwards slightly, feathering the edges into your foundation or bare skin, ensuring there are no harsh lines. Pay attention to the inner corner of your eye and the outer edge where any darkness might extend. The aim is a seamless transition, where the under-eye area looks brightened and even, but still natural and like your skin. Check your reflection in different lighting to ensure there’s no visible orange tint from the corrector or any unblended edges. If you need more coverage, add another *very thin* layer, tapping it in gently.
Step-by-Step: Covering Hyperpigmentation and Dark Spots
Covering hyperpigmentation and dark spots on deep skin requires a similar philosophy to dark circles but with a slightly different application technique, focusing on precision and seamless integration with your overall complexion. The goal is to make the spots disappear without creating a noticeable texture or color difference.
Spot Correct Your Darkest Areas
Just as with dark circles, color correction is the foundational step for hyperpigmentation. This is especially true for stubborn acne scars, sun spots, or areas of melasma that appear deep brown or even grayish.
Identify the darkest areas of your hyperpigmentation. These might be individual acne scars on your cheeks or jawline, larger patches around your mouth or forehead, or lingering marks from ingrown hairs. Select your peach, orange, or brick red corrector. For most deep brown spots on deep skin, an orange or deep orange-red corrector will be most effective. Using a very fine-tipped brush (like a small eyeliner brush or a precise concealer brush) or the tip of a clean cotton swab, apply a tiny dot of corrector directly onto the center of each dark spot. For larger patches, apply a very thin wash of corrector only to the most concentrated areas of discoloration. The key is extreme precision and minimal product. Gently tap the edges of the corrector into the spot using your finger or the brush, ensuring the product stays localized to the discolored area. You want to neutralize the deep brown or gray tone, turning it into a more muted, neutral brown or peachy-brown. Allow the corrector to set for about 30 seconds to a minute. This ensures it adheres to the skin and doesn’t immediately mix with your concealer.
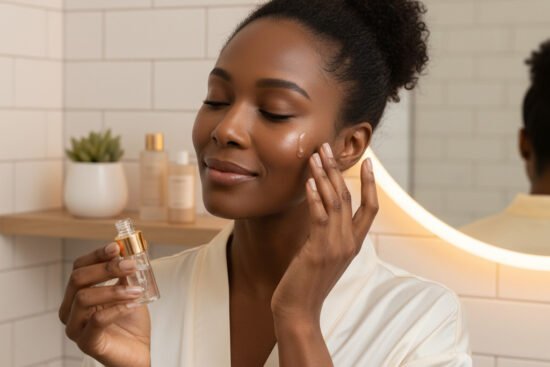
Conceal Without Creating Patches
After successful correction, the concealer’s role is to perfectly match your skin tone and create an invisible finish.
Choose a concealer that is an exact match to your foundation or natural skin tone. This is crucial to avoid creating light patches where the dark spots used to be. Using a small, clean concealer brush or your ring finger, pick up a tiny amount of the skin-toned concealer. Gently dab or tap the concealer directly over the corrected dark spot. The tapping motion is essential to press the product into the skin without disturbing the corrector underneath. Blend the edges of the concealer outwards very subtly, feathering it into the surrounding skin. The goal is for the spot to disappear completely, blending seamlessly with your complexion. Avoid rubbing or dragging, which can lift the corrector and concealer, exposing the hyperpigmentation again. If you have several spots close together, treat them individually rather than applying a large swathe of concealer, which can look heavy. After application, step back and check your work in natural light. The spot should be undetectable, and the area should look like your natural, even skin. If needed, apply another *micro-thin* layer, but always prioritize thin, buildable applications over a single thick one.
When to Use Foundation Before or After Correcting
The order of foundation application relative to correction can impact the final look and the amount of product needed. There are valid reasons for both approaches, and the best method often depends on your coverage needs and personal preference.
Applying Foundation Before Correcting: This is a common and often preferred method, especially if you’re aiming for a more natural, everyday look or if your hyperpigmentation isn’t extremely severe. By applying your foundation first, you provide an initial layer of coverage that can already diminish the appearance of some lighter discoloration. This means you might need less corrector and less concealer afterwards, leading to a lighter, more skin-like finish. After applying your foundation (we recommend exploring our foundation guide for deep skin tones for the best options), you can then pinpoint any remaining dark circles or hyperpigmentation that still peek through. This method helps you assess exactly where targeted correction is needed, preventing over-application. It’s particularly effective for those who prefer a medium coverage base and want to avoid a heavy makeup look.
Applying Foundation After Correcting: This method is often favored for full-coverage looks, special occasions, or when dealing with very intense hyperpigmentation or dark circles. By correcting first, you create a neutral canvas for your foundation. Once the corrector is applied and lightly blended, you can then apply your foundation over the entire face, including the corrected areas. The foundation will help to further blend and mute the corrector, ensuring it doesn’t look too orange or red. This approach can be more time-consuming and might require a slightly more careful application of foundation over the corrected areas to avoid disturbing the product underneath. However, it ensures that the most stubborn discoloration is thoroughly neutralized before the final base is applied, often resulting in a more uniform and flawless appearance. If you choose this method, ensure your corrector is very thin and well-set before applying foundation to prevent it from mixing and creating a muddy effect.
Ultimately, experiment with both orders to see which works best for your skin and your desired level of coverage. For most everyday scenarios, applying foundation first allows for a more targeted and often lighter application of corrector and concealer. For a truly flawless, camera-ready finish, correcting first can provide that extra layer of perfection, especially when combined with our tips for makeup for photos and video on deep skin.
Setting Corrected Areas on Deep Skin (Without Ashiness)
Setting your corrected and concealed areas is the final, crucial step to ensure longevity, prevent creasing, and maintain a flawless finish. However, for deep skin, this step often presents its own set of challenges. The wrong powder, applied incorrectly, can instantly undo all your careful work, leading to ashiness, flashback, or a dull, flat appearance. The key is strategic application and choosing the right products that complement, rather than detract from, your rich complexion.
Setting powder locks in your liquid and cream products, preventing them from moving, creasing, or fading throughout the day. It also helps to absorb excess oil, keeping your skin looking fresh. However, over-powdering, especially with translucent powders that contain too much silica or white pigment, can create a ghostly white cast on deep skin, particularly in flash photography. It can also emphasize texture and fine lines, making the skin look dry and aged. The goal is to set just enough to secure the makeup without sacrificing the natural radiance of your skin or creating an undesirable finish.
Powders for Under-Eyes and Hyperpigmentation
Choosing the right setting powder is paramount for deep skin. Forget about universal “translucent” powders that often look chalky on our complexions.
- For Under-Eyes: For the delicate under-eye area, look for finely milled, lightweight setting powders. Tinted powders, specifically in shades of banana (a soft yellow) or a warm peach, are often ideal. These tones help to further brighten and neutralize any lingering coolness, without adding a heavy white pigment. A truly translucent powder formulated for deep skin, which appears invisible on the skin, can also work, but be sure to test it first. Avoid powders that are too heavy, too matte, or contain a lot of shimmer, as these can emphasize fine lines and texture.
- For Hyperpigmentation and Overall Face: For setting corrected spots and the rest of your face, a finely milled powder that matches your skin tone or is a very subtle warm tint (like a light bronze or warm beige) is best. This ensures seamless integration with your foundation and concealer. Pressed powders can be great for touch-ups and targeted setting, while loose powders often provide a more airbrushed finish for initial setting. Again, prioritize powders that are truly invisible on your skin and don’t leave a white cast. Our setting powders and sprays for melanin-rich skin guide offers a deeper dive into specific product recommendations.
You can find excellent options for finely milled, tinted setting powders on Amazon. Shop banana setting powder on Amazon.
Placement and Amount of Powder
Strategic placement and a light hand are key to setting without ashiness.
For Under-Eyes: Before applying powder, gently press any creased concealer back into place with a clean finger or damp sponge. Then, using a small, fluffy brush or a damp beauty sponge, pick up a tiny amount of your chosen under-eye setting powder. Lightly press (don’t swipe) the powder onto the areas where you applied concealer. Focus on the inner corner and along the tear trough, where creasing is most common. Use a very thin layer – just enough to set the product. If you’re using a damp sponge, a technique called “baking” can be effective for extra longevity: apply a slightly more generous layer of powder with the damp sponge, let it sit for 5-10 minutes, then lightly dust off the excess with a fluffy brush. This method provides a very smooth, long-lasting finish, but should be used sparingly to avoid dryness.
For Hyperpigmentation Spots: For individual spots, use a small, precise brush to lightly dust a tiny amount of skin-toned setting powder directly over the concealed area. This locks the concealer in place without adding unnecessary texture to the surrounding skin. For larger areas of hyperpigmentation (like around the mouth or forehead), use a fluffy brush to lightly sweep powder over the area, ensuring it’s blended seamlessly into your foundation. The goal is to set the makeup, not to create a visibly powdered finish. Always tap off excess powder from your brush before applying.
Avoiding Flashback in Photos
Flashback is the bane of many makeup wearers, especially those with deep skin. It occurs when certain ingredients in powder (like silica or titanium dioxide) reflect light, creating a white or ghostly cast in flash photography.
To avoid flashback, be mindful of the ingredients in your setting powder. While silica can be a culprit, it’s often the *amount* and *fineness* of the silica, combined with over-application, that causes the issue. Opt for powders specifically marketed as “no-flashback” or “photo-friendly.” Tinted powders (banana, peach, or skin-toned) are generally safer bets than stark white translucent powders. The most important rule is to use powder sparingly, especially in areas that will be hit directly by flash, like the under-eyes and the center of the face. After setting, lightly mist your face with a hydrating setting spray. This helps to melt the powders into the skin, reducing any powdery appearance and further locking everything in place without adding a white film. For more in-depth advice on looking flawless on camera, consult our guide on camera-ready makeup for deep skin tones. Always test your makeup with a flash photo before a big event to ensure you’re flashback-free.
Everyday vs Full-Coverage Versions of This Routine
The beauty of the correct, conceal, set technique is its versatility. It can be adapted to suit any occasion, from a quick, natural everyday look to a polished, full-coverage finish for special events. Understanding how to scale the intensity of each step allows you to tailor your makeup to your needs without compromising on effectiveness.
For an everyday look, the goal is often to enhance your natural beauty with minimal effort, achieving a fresh, even complexion without feeling heavily made up. This means streamlining the correction and concealment process. You might focus only on the most prominent areas of discoloration, rather than every single spot. For example, if your dark circles are your primary concern, you might only apply a thin layer of corrector and a sheer layer of concealer under your eyes, skipping full-face spot correction. The blending would be quicker, perhaps just using your fingers for warmth and speed. The setting step would also be lighter – a quick dusting of powder only in areas prone to creasing or shine, or even just a setting spray. This lighter approach integrates beautifully with an everyday natural makeup routine for deep skin, allowing you to look put-together and radiant in just 10 minutes. The emphasis is on looking like *you*, but on your best day, with just enough coverage to boost confidence.
Conversely, for a full-coverage look, such as for a photoshoot, a wedding, or a special evening event, you would execute each step with more precision and potentially slightly more product. Every area of hyperpigmentation and all dark circles would receive targeted correction. The corrector would be applied with meticulous detail, ensuring complete neutralization. Concealer would then be layered more deliberately, perhaps using a slightly thicker formula for maximum coverage, and blended flawlessly with brushes and sponges. The setting process would be more thorough, potentially incorporating baking under the eyes and a more comprehensive dusting of setting powder across the face, followed by a robust setting spray to ensure longevity and a truly airbrushed finish. This full-coverage approach is about achieving a perfected, camera-ready complexion that withstands hours of wear and scrutiny, often drawing on techniques discussed in our guide to makeup for photos and video on deep skin. The key is to build coverage in thin layers, even for full glam, to avoid cakiness.
Troubleshooting: Common Problems and Fixes
Even with the best techniques, makeup can sometimes present unexpected challenges. Here are common issues encountered when covering hyperpigmentation and dark circles on deep skin, along with practical solutions.
Concealer looks gray/ashy
Problem: You’ve applied your concealer, but instead of brightening, your under-eyes or spots look dull, grayish, or ashy.
Fix: This is almost always a sign that your color corrector wasn’t effective enough, or you skipped it entirely. The grayness occurs when a light-toned concealer mixes with the underlying blue-purple or deep brown discoloration without proper neutralization. The solution is to go back to the correction step. Ensure you’re using an orange or brick red corrector that is deep enough for your specific discoloration. Apply it precisely and let it set before applying concealer. If you already used a corrector and still have ashiness, your corrector might not be deep or warm enough, or you didn’t apply enough of it to fully neutralize the darkness. Another possibility is that your concealer itself has a cool undertone that clashes with your skin. Ensure your concealer has a warm (golden, peachy) undertone that complements your skin.
Under-eyes too bright
Problem: Your under-eyes look unnaturally bright, almost like “reverse panda eyes,” or they stand out too much from the rest of your face.
Fix: This usually happens when the concealer shade chosen for the under-eye area is too light. While a slightly lighter shade is desired for brightening, “too light” creates a stark contrast. Re-evaluate your concealer shade; it should be only one to two shades lighter than your foundation, not three or more. Also, ensure your corrector isn’t too light or too widely applied, as a bright peach on very deep skin can sometimes contribute to this. If you’ve already applied it, you can try to gently blend a tiny amount of your foundation or a slightly darker, skin-toned concealer over the edges to soften the brightness.

Coverage looks cakey in daylight
Problem: Your makeup looks smooth indoors, but in natural daylight, your corrected and concealed areas appear thick, heavy, or textured.
Fix: Cakiness is often a result of applying too much product, especially in layers. Remember the “less is more” mantra. Ensure each layer—corrector, concealer, and powder—is applied as thinly as possible. Tap, don’t swipe, to press the product into the skin rather than layering it on top. Also, proper skin prep with a hydrating eye cream is crucial to prevent dry patches that can make makeup cling and look cakey. If your powder is too heavy or too matte, it can also contribute to cakiness; opt for finely milled, hydrating powders. If you’ve already applied it, a spritz of hydrating setting spray can sometimes help melt the layers together for a more natural finish.
Spots still peek through
Problem: After all your efforts, dark spots or hyperpigmentation are still visible.
Fix: This indicates insufficient correction or coverage. First, check your corrector: is it deep enough for the darkness of the spot? Is it applied precisely to the darkest part? You might need a deeper orange or brick red corrector. Second, ensure your concealer is full coverage enough for the spot. Sometimes, a very thin layer of a sheer concealer won’t cut it. You might need to gently build up an additional *very thin* layer of concealer directly on the spot, tapping it in. Also, ensure you’re not accidentally wiping off the corrector or concealer during blending or foundation application. Use a gentle patting motion.
Corrector makes things look orange
Problem: Instead of neutralizing, your corrector leaves an obvious orange tint that’s hard to cover.
Fix: This can happen for a few reasons. You might be applying too much corrector, or applying it too broadly beyond the discolored area. Remember, it should be a sheer wash of color that neutralizes, not a thick layer that creates a new problem. Alternatively, your corrector might be the wrong shade of orange for your skin tone or the specific discoloration. If it’s too bright or too yellow-orange, it might be more noticeable. Try a slightly deeper, more muted orange or a brick red. Ensure you’re blending the edges carefully and allowing it to set before applying concealer. The concealer’s job is to cover that subtle orange tint and match your skin tone.
Frequently Asked Questions
Do I always need a color corrector on dark skin?
While not every single person with dark skin will need a corrector for every area, it is highly recommended for most instances of hyperpigmentation and dark circles. For deep skin, discoloration often presents as blue-purple or deep brown, which can appear ashy or gray if only covered with concealer. A corrector neutralizes these tones first, allowing your concealer to work more effectively and achieve a natural, brightened finish without looking dull.
How do I stop under-eye concealer from creasing?
Preventing under-eye creasing starts with proper skin prep: ensure the area is well-hydrated with an eye cream before makeup. Apply corrector and concealer in very thin layers, tapping rather than swiping. Finally, set the area immediately with a finely milled, lightweight setting powder using a gentle pressing motion. Avoid applying too much product, as excess makeup is more prone to settling into fine lines.
Should my concealer be the same undertone as my foundation?
For covering hyperpigmentation and dark spots, your concealer should ideally match your foundation’s undertone (and shade) perfectly to ensure seamless blending. However, for under-eye brightening, a concealer with a slightly warmer or peachier undertone than your foundation can be beneficial, as it helps to counteract any lingering darkness and adds a subtle lift to the area, making you look more awake.

Can I use the same concealer for under-eyes and spots?
While it’s possible, it’s often more effective to use two different concealers. Under-eye concealers typically benefit from being one to two shades lighter than your skin tone and having a hydrating, flexible formula to prevent creasing. For spots, an exact skin-tone match with a slightly higher coverage, often more matte or satin finish, works best to make the spot disappear into your complexion without creating a highlight.
How much lighter can I go under my eyes without looking unnatural?
For deep skin, it’s generally recommended to go only one to two shades lighter than your foundation for under-eye concealer. Going significantly lighter (e.g., three or more shades) can result in an unnatural, stark, or “reverse panda eye” effect, especially on melanin-rich skin. The goal is subtle brightening and lifting, not a dramatic highlight that contrasts too sharply with your natural complexion.
Is it better to correct before or after foundation on deep skin?
Both methods have their merits. Correcting *before* foundation is often preferred for very deep or stubborn discoloration, as it ensures thorough neutralization before the base layer is applied. Correcting *after* foundation is excellent for everyday looks or when discoloration is less severe, as the foundation provides initial coverage, allowing you to use less corrector and concealer in a more targeted way, leading to a lighter, more natural finish.
What if my corrector looks too orange under my foundation?
If your corrector is still visible as too orange after applying foundation, it usually means one of two things: either you applied too much corrector, or your foundation isn’t providing enough coverage to effectively mute the corrector. Try applying a thinner layer of corrector next time, ensuring it’s just enough to neutralize the darkness. Alternatively, you might need a foundation with slightly more coverage, or a second *very thin* layer of foundation over the corrected area, gently patted into place.
Final Thoughts
Embracing the beauty of your deep, melanin-rich skin means understanding its unique needs and celebrating its inherent radiance. Hyperpigmentation and dark circles are natural occurrences, not imperfections, and with the right knowledge, you have the power to address them with confidence and artistry. This comprehensive guide, rooted in the principles of correct, conceal, and set, is your roadmap to achieving a flawless, natural-looking complexion that truly reflects your inner glow. By prioritizing undertone-aware choices and precise application, you’ll find that you need less product to achieve a smoother, more believable finish, allowing your true skin to shine through.
Remember, the journey to mastering these techniques is about practice and patience. Don’t be afraid to experiment with different shades of correctors and concealers, and to adjust the intensity of your application to suit your individual needs and the occasion. Each application is an opportunity to learn more about your unique skin and how best to enhance its beauty. The goal is always to look and feel like the most confident, authentic version of yourself, without compromise or stereotype.
We invite you to continue exploring the rich tapestry of beauty knowledge available at Black Beauty Basics. Connect these powerful coverage techniques with our broader resources on finding your perfect foundation, understanding your undertone, and creating stunning everyday looks. Visit our Makeup for Deep Skin Tones hub to further refine your skills and build a comprehensive beauty routine that truly celebrates you. Your beauty is your power – wield it with grace and confidence.
Related next steps
Related posts:
 Color Correcting 101: How to Neutralize Dark Circles & Hyperpigmentation on Melanin Skin (Without Looking Gray)
 How to Treat Dark Circles With the Right Skincare Products
 The Power of Color Correcting – Neutralizing Dark Spots and Under-Eye Circles
 How SPF Supports Hyperpigmentation and Dark Spot Work on Dark Skin
 Catamenial Hyperpigmentation & Dark-Spot Flares on Dark Skin
 Pregnancy Skin Changes on Dark Skin: Hyperpigmentation, Melasma, and Linea Nigra