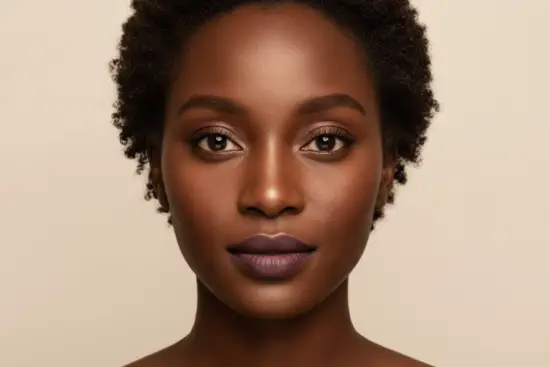
Using Correctors and Multiple Concealers on Melanin-Rich Skin
For many of us with melanin-rich skin, the journey to a flawless base has often been fraught with well-meaning but ultimately unhelpful advice. We’ve been told to “brighten” our under-eyes with a concealer several shades lighter than our skin, only to find ourselves looking ashy, gray, or like we’ve highlighted an area we intended to conceal. We’ve purchased a single concealer, hoping it would magically erase every trace of discoloration, from persistent post-inflammatory hyperpigmentation (PIH) to the natural darkness around our mouths, only to be left frustrated when it simply couldn’t do it all.
The truth is, the landscape of base makeup for deep skin tones is wonderfully nuanced, and sometimes, a single product simply isn’t enough to address the diverse needs of our complexions. Our skin, rich in melanin, often presents a beautiful array of undertones and variations in color across the face. These variations, while natural and stunning, can sometimes require a more strategic approach than a one-size-fits-all concealer can offer. This isn’t about adding unnecessary steps or products to your routine; it’s about precision, intention, and understanding the specific jobs each product can do to enhance your natural beauty without masking it.
This guide is crafted to demystify the art of using correctors and multiple concealers on melanin-rich skin. We’ll explore how to leverage these tools not as burdens, but as allies in achieving a harmonious, radiant base. Our goal is to empower you to make informed choices, ensuring that every product you apply serves a clear purpose, solving a specific color or coverage problem, and ultimately leading to a result that is refined, seamless, and authentically you. Prepare to transform your approach to base makeup, moving beyond generic advice to embrace techniques that truly celebrate and complement your unique skin.
What This Post Covers
This article is designed to be your comprehensive guide to understanding and effectively utilizing color correctors and multiple concealers on melanin-rich skin. We will delve into the specific challenges and opportunities that deep skin tones present, moving beyond generalized beauty advice to offer insights tailored to your unique complexion. Our journey begins by acknowledging the inherent complexity and beauty of melanin-rich skin, setting the stage for a more precise and intentional approach to base makeup.
We will meticulously break down the distinct functions of color correctors, explaining how they neutralize unwanted tones before concealer is even applied, preventing the need for excessive product later. You’ll learn the critical difference between correcting, matching, and brightening concealers, understanding when each is most effective and how to select the right shades for each purpose. We’ll tackle common concerns such as under-eye darkness, post-inflammatory hyperpigmentation (PIH), and natural variations in skin tone around the mouth, providing practical strategies for each.
Furthermore, we will guide you through the process of determining when one concealer is sufficient and when incorporating a second, or even a third, can elevate your base. The emphasis will always be on strategic placement and minimal product, ensuring that your makeup looks like enhanced skin, not a heavy mask. We’ll also address the pitfalls of over-correction, offering techniques to avoid common issues like ashiness, grayness, or an overly made-up appearance. By the end of this guide, you will possess the knowledge and confidence to approach your base makeup with precision, creating a harmonious and radiant finish that celebrates your deep, rich complexion.
Why Deep Skin Often Needs More Undertone Precision
Melanin-rich skin is a tapestry of incredible depth and complexity, far removed from a monolithic “dark” shade. This inherent richness means that our skin often possesses a wider spectrum of undertones and overtone variations than lighter skin tones. Where some complexions might have a simple cool or warm undertone, deep skin can exhibit a vibrant interplay of red, gold, olive, and even subtle blue or gray nuances within the same face. This beautiful diversity, while a hallmark of our unique beauty, also means that a nuanced approach to color is not just beneficial, but often essential for a truly seamless base.
Consider, for instance, the common experience of under-eye darkness. On melanin-rich skin, this isn’t always a simple shadow; it can manifest as a deep purplish-blue, a greenish-brown, or even a grayish cast, depending on your individual undertones and the specific area of the face. A generic “light” concealer, designed to brighten by contrast, will often fail to neutralize these underlying tones. Instead, it can sit on top, creating an ashy, chalky, or even more prominent gray appearance, because it lacks the specific color opposite on the color wheel needed to cancel out the discoloration.
Similarly, post-inflammatory hyperpigmentation (PIH) — those stubborn dark spots left behind by acne or irritation — can present in various shades of brown, deep red, or even purplish-black. A standard concealer might cover the intensity of the spot, but if it doesn’t also address the underlying color, the spot can still peek through with an unwanted hue. The natural darkness around the mouth, a common feature for many with deep skin, also requires a thoughtful approach. This isn’t necessarily a “flaw” to be erased, but rather a natural variation that, if desired, can be harmonized with the rest of the complexion through precise color application.
This need for undertone precision extends beyond just correcting. When selecting a foundation or a matching concealer, understanding your skin’s unique undertones — whether they lean warm (golden, yellow, peach), cool (red, blue, plum), or neutral (a balance of both) — is paramount. A foundation that’s too warm can look orange, while one that’s too cool can appear ashy or gray. For deep skin, these subtle misalignments are often amplified, making the difference between a radiant, second-skin finish and a visibly mismatched, unnatural look. Therefore, embracing the concept of undertone precision isn’t about complicating your routine; it’s about honoring the rich complexity of your skin and empowering you to achieve a truly harmonious and natural-looking base.
What Correctors Do That Concealer Does Not
To truly master the art of base makeup on melanin-rich skin, it’s crucial to understand the fundamental difference between a color corrector and a concealer. While both are designed to camouflage imperfections, they achieve this goal through entirely distinct mechanisms. A concealer’s primary job is to match your skin tone (or be slightly lighter for brightening) and provide opaque coverage, essentially covering up a concern. A color corrector, on the other hand, works on the principle of color theory: it neutralizes unwanted tones by applying the opposite color on the color wheel *before* concealer or foundation. This pre-emptive neutralization is what makes correctors indispensable for certain concerns on deep skin.
Imagine you have a deep blue-purple under-eye area. If you apply a skin-toned concealer directly over this, the blue-purple might still show through, making the concealer appear grayish or ashy. To counteract this, you might be tempted to apply more concealer, leading to a heavy, cakey look. This is where a corrector steps in. For blue-purple tones, an orange or peach corrector is the ideal choice. Orange sits opposite blue on the color wheel, and peach is a lighter, more muted version of orange. When applied thinly to the blue-purple area, the orange/peach pigment neutralizes the blue-purple, effectively canceling it out. This leaves a more neutral canvas for your concealer to then seamlessly blend into your skin tone, requiring far less product and resulting in a much more natural finish.
The magic of correctors lies in their ability to address the *color* of a discoloration, rather than just its intensity. For melanin-rich skin, this is particularly vital because our natural variations and common concerns often involve strong underlying colors. For example:
- Under-Eye Darkness: As discussed, blue, purple, or even green undertones in under-eye circles can be effectively neutralized by peach, orange, or even red correctors, depending on the depth of the discoloration. The deeper the discoloration, the deeper the corrector shade needed.
- Post-Inflammatory Hyperpigmentation (PIH): These dark spots can often have a reddish-brown or purplish hue. A yellow-orange or even a red corrector can help to neutralize these tones, allowing your concealer to cover them without looking muddy or gray.
- Around-the-Mouth Darkness: This natural pigmentation can sometimes have a grayish or purplish cast. A warm, peachy-orange corrector can help to bring it into harmony with the rest of the face.
Without a corrector, a concealer is often fighting an uphill battle against strong underlying colors. It has to work harder, meaning you need to use more of it, which inevitably leads to a heavier, less natural look. Correctors, when used sparingly and precisely, allow your concealer to perform its job of matching and covering with minimal effort, resulting in a more refined, seamless, and truly undetectable finish. They are the unsung heroes that create the perfect canvas, ensuring your complexion looks balanced and radiant without a hint of ashiness or over-application.
When One Concealer Is Enough and When Two Can Help
The question of how many concealers you need isn’t about accumulating products; it’s about strategic problem-solving. For many, a single, well-matched concealer is perfectly sufficient, especially for an everyday look or if your primary concerns are minor blemishes or slight evening out of skin tone. However, for those with melanin-rich skin, the diverse range of tones and common concerns often means that a second, or even a third, concealer can serve a distinct and valuable purpose, elevating your base from good to truly exceptional. The key is to ensure each concealer has a specific “job” to do.
When One Concealer Is Enough
A single, well-chosen concealer is ideal when your primary goal is straightforward spot concealing or a subtle enhancement. This concealer should be an exact match to your skin tone, or very, very close. Its purpose is to seamlessly blend into your foundation or bare skin, effectively erasing minor imperfections without drawing attention to the concealed area. You might reach for one concealer if:
- You have minimal discoloration: If your under-eyes are only slightly shadowed, or your PIH spots are few and light, a single matching concealer can often provide adequate coverage without the need for color correction.
- You prefer a very natural, “no-makeup” look: For days when you want minimal coverage, a matching concealer can be used precisely where needed, allowing your natural skin to shine through.
- Your primary concern is spot coverage: If you’re mainly covering a single blemish or a small area of redness, a matching concealer applied with precision is often all that’s required.
- You’re using a full-coverage foundation: Sometimes, a robust foundation can adequately address minor discolorations, leaving less work for a concealer.
In these scenarios, the goal is simply to unify the complexion. The single concealer should melt into your skin, becoming undetectable. Its texture should be appropriate for the area you’re concealing – perhaps a slightly creamier formula for under-eyes, or a more matte, long-wearing one for blemishes.

When Two (or More) Concealers Can Help
The utility of multiple concealers becomes apparent when your skin presents different types of concerns that require distinct approaches. This is particularly common with melanin-rich skin, where variations in pigmentation, under-eye darkness, and PIH can coexist, each demanding a tailored solution. The concept here is not to layer indiscriminately, but to assign a specific role to each product.
Typically, when using multiple concealers, you’ll be working with:
- A Correcting Concealer (or Color Corrector + Matching Concealer): This is for neutralizing strong discoloration. As discussed, a peach, orange, or red-toned product will cancel out blue, purple, or deep brown tones. This isn’t always a “concealer” in the traditional sense, but often a dedicated color corrector. However, some brands offer “correcting concealers” that combine the neutralizing pigment with a bit more coverage.
- A Matching Concealer: This is your workhorse. It should be an exact match to your skin tone and is used to cover corrected areas, spot conceal blemishes, or even out minor skin tone discrepancies. Its purpose is to blend seamlessly with your foundation or bare skin.
- A Brightening Concealer: This is where the nuance comes in. A brightening concealer is typically one to two shades lighter than your skin tone and has a slightly warmer (peachy or golden) undertone. Its job is *not* to correct color, but to bring light and dimension to specific areas, such as the high points of the face or the very center of the under-eye area *after* any darkness has been corrected and matched. It creates a subtle lift and glow, without looking stark or ashy.
The benefit of this multi-concealer approach for deep skin is precision. Instead of trying to make one product do everything (which often results in over-application or an unnatural finish), you’re using specialized tools for specialized jobs. For instance, you might use an orange corrector under your eyes to neutralize darkness, then a matching concealer over that to blend it into your skin, and finally, a touch of brightening concealer in the inner corner to lift and awaken. This methodical approach ensures that each concern is addressed effectively, leading to a more harmonious, radiant, and natural-looking base that celebrates the depth and beauty of your melanin-rich complexion.
How to Use Matching, Brightening, and Spot Concealers Together
Mastering the art of using multiple concealers is about understanding their distinct roles and applying them strategically. This isn’t about piling on product; it’s about precision and intention, ensuring each layer serves a specific purpose for a seamless, radiant finish on melanin-rich skin. Let’s break down how to integrate matching, brightening, and spot concealers, often in conjunction with a color corrector, for optimal results.
The Foundation: Color Correction (When Needed)
Before any concealer touches your skin, assess if color correction is necessary. This is the crucial first step for significant discoloration on deep skin tones, such as prominent under-eye circles, deep PIH, or pronounced darkness around the mouth.
- For Under-Eye Darkness: If your under-eyes have a blue, purple, or deep brown cast, select an orange or peach corrector. For very deep tones and pronounced discoloration, a red or terracotta corrector might be more effective. Apply a very thin layer only to the areas of discoloration, tapping it in gently with your ring finger or a small, fluffy brush. The goal is to neutralize the unwanted color, not to completely cover it. It should look like a subtle tint, not a thick mask.
- For PIH or Dark Spots: For reddish-brown or purplish spots, a yellow-orange or a deeper orange corrector can be applied precisely to the center of the spot. Again, use a minimal amount and blend the edges lightly.
The key here is to apply correctors *before* foundation or matching concealer. This allows the corrector to do its job of neutralizing the color without being diluted or disturbed by subsequent layers.
Step 1: The Matching Concealer – Your Seamless Base
Once any necessary color correction has been applied (and ideally, a thin layer of foundation if you wear it), it’s time for your matching concealer. This is your workhorse, designed to blend seamlessly with your skin tone and foundation, providing coverage without adding extra color or brightness.
- Purpose: To cover corrected areas, spot conceal blemishes, even out minor skin tone discrepancies, and provide overall coverage where your foundation might not be enough.
- Shade Selection: This concealer should be an exact match to your skin tone, or at most, a half-shade lighter with the same undertone.
- Application:
- Over Corrected Areas: Apply a thin layer directly over the color-corrected area (e.g., under-eyes, PIH). Gently tap or pat it in with your finger, a sponge, or a brush. The goal is to blend it into your skin and foundation, not to rub away the corrector underneath. The corrected area should now appear unified with the rest of your skin.
- Spot Concealing: For blemishes, redness, or other minor imperfections, apply a small dot of matching concealer directly onto the spot. Let it sit for a few seconds to warm up and become more opaque, then gently tap the edges to blend it seamlessly into the surrounding skin. Avoid swiping, which can remove the product.
- Key Principle: Use sparingly. The less product you use, the more natural the finish. If you’ve color corrected effectively, you’ll need very little matching concealer.
Step 2: The Brightening Concealer – Adding Dimension and Lift
The brightening concealer is the final touch, used to strategically bring light and dimension to the face. It is *not* for correcting color, and should only be applied *after* any discoloration has been neutralized and covered with a matching shade.
- Purpose: To illuminate high points, create a lifted effect, and add a subtle glow. It makes the face appear more awake and sculpted.
- Shade Selection: One to two shades lighter than your skin tone, with a warm (peachy or golden) undertone. Avoid anything too cool or starkly light, which can look ashy or chalky on deep skin. The warmth helps to prevent a gray cast.
- Application:
- Under-Eyes: Apply a small amount in the inner corner of the eye, extending slightly onto the orbital bone, and perhaps a tiny dot in the outer corner to create a lifted effect. Blend gently by tapping with a finger or a small, damp sponge. Focus on the areas you want to bring forward, not the entire under-eye area.
- High Points: A touch on the center of the forehead, down the bridge of the nose, on the cupid’s bow, and on the chin can add subtle dimension.
- Key Principle: Less is truly more. This is about strategic highlighting, not broad coverage. Its effect should be subtle and luminous, not obvious.
Putting It All Together: A Practical Example
Let’s say you have deep blue-purple under-eyes and a few reddish-brown PIH spots on your cheeks.
- Correct: Apply a thin layer of orange corrector to the blue-purple under-eyes. Apply a tiny dot of yellow-orange corrector to each PIH spot. Blend gently.
- Foundation: Apply your regular foundation, carefully blending around the corrected areas.
- Match: Apply your matching concealer over the orange-corrected under-eyes, blending seamlessly. Apply a tiny dot of matching concealer over each yellow-orange-corrected PIH spot, blending the edges.
- Brighten: Apply a small amount of your brightening concealer to the inner corner of your eyes and a tiny dot just below the outer tail of your brow. Blend gently.
By following these steps, you ensure that each product performs its specific function, leading to a refined, harmonious, and naturally radiant complexion without any heaviness or ashiness. This methodical approach truly celebrates the beauty of melanin-rich skin by addressing its unique needs with precision.
How to Keep Correction from Turning Heavy, Gray, or Obvious
The goal of using correctors and multiple concealers on melanin-rich skin is to achieve a seamless, natural-looking base, not to create a heavy, gray, or obvious mask. Unfortunately, without proper technique and product selection, these undesirable outcomes can easily occur. The key to avoiding them lies in understanding the common pitfalls and implementing precise strategies. This section will guide you through preventing these issues, ensuring your base makeup remains radiant and undetectable.
The “Heavy” Problem: Over-Application
The most common reason for a heavy-looking base is simply using too much product. Each layer – corrector, matching concealer, brightening concealer – adds to the overall coverage. If any one of these layers is applied too thickly, the cumulative effect will be a cakey, unnatural finish.
- Solution: Less is More: This mantra cannot be overstated.
- Correctors: Apply the absolute thinnest layer possible, only to the areas of discoloration. You’re neutralizing color, not covering it completely. If you can still see a hint of the discoloration after correction, that’s often okay, as the matching concealer will finish the job.
- Matching Concealer: Use a tiny amount. If you’ve corrected effectively, you’ll need very little matching concealer to unify the area with your skin tone.
- Brightening Concealer: This is for strategic light, not coverage. A pin-dot amount in targeted areas is usually sufficient.
- Application Technique: Use tapping or patting motions with your finger, a small brush, or a damp beauty sponge. Avoid swiping or rubbing, which can move the product around and create streaks or disrupt the layers underneath.
- Product Consistency: Opt for liquid or creamy formulas that are easily blendable and less prone to caking. Avoid overly thick or dry formulas, especially under the eyes.
The “Gray” Problem: Undertone Mismatch and Over-Correction
Ashiness or a gray cast is a common and frustrating issue for deep skin tones, often stemming from an undertone mismatch or incorrect correction.
- Undertone Mismatch in Concealer/Foundation:
- Too Cool/Pink: If your skin has warm or neutral undertones and you use a concealer or foundation that is too cool (pink or red-based), it can appear gray or ashy.
- Too Light/Stark: A brightening concealer that is too light or lacks a warm undertone can also create a gray cast, especially under the eyes, as it clashes with the natural depth of melanin-rich skin.
- Solution: Warm Undertones are Key for Brightening: For brightening, always lean towards concealers that are 1-2 shades lighter than your skin tone but have a peachy or golden undertone. This warmth prevents the stark contrast that leads to ashiness.
- Over-Correction with Correctors:
- Too Much Corrector: If you apply too much orange/peach/red corrector, it can become the dominant color, leading to an orange or reddish cast that then needs *more* concealer to cover, creating a heavy look.
- Wrong Corrector Shade: Using a corrector that is too light or too dark for the discoloration can also lead to issues. For example, a very light peach corrector might not be strong enough for deep blue-purple under-eyes, leading to a muddy gray. Conversely, a very deep red corrector on light discoloration can look unnatural.
- Solution: Precision in Corrector Shade and Amount: Match the depth of the corrector to the depth of the discoloration. Use only enough to neutralize, not to completely erase the underlying color. The corrector should blend into a subtle tint.
- Lack of Setting: While not directly causing grayness, not setting creamy products can lead to creasing and fading, which can make the makeup look less fresh and more “off” over time. A finely milled, translucent setting powder (or one with a warm, yellow undertone) applied sparingly can help lock everything in without adding weight.
The “Obvious” Problem: Lack of Blending and Harsh Lines
Makeup looks “obvious” when it doesn’t seamlessly transition into your natural skin. Harsh lines, unblended edges, or visible patches of product are tell-tale signs.
- Solution: Blend, Blend, Blend:
- Edges are Crucial: Pay meticulous attention to blending the edges of every product. Whether it’s a corrector, matching concealer, or brightening concealer, the edges should feather out into your skin or the previous layer, with no visible lines.
- Tools: Use a damp beauty sponge for a seamless, airbrushed finish, or a soft, fluffy brush for precise blending. Your ring finger, with its natural warmth, can also be excellent for melting product into the skin.
- Working in Sections: Don’t apply all products at once. Work on one area at a time, blending thoroughly before moving to the next. This prevents products from drying down and becoming harder to blend.
- Check in Different Lighting: Always check your makeup in natural light, if possible, and from different angles. What looks fine in your vanity mirror might look obvious in daylight.
- Product Choice: Choose formulas that are designed to be blendable and have a natural finish. Avoid products that dry too quickly or are overly matte, as these can be harder to work with.
By prioritizing minimal product, precise application, correct undertone selection, and thorough blending, you can ensure that your use of correctors and multiple concealers on melanin-rich skin results in a truly natural, radiant, and undetectable finish. It’s about enhancing, not hiding, the beautiful canvas of your skin.
How to Navigate This Topic
Navigating the world of color correctors and multiple concealers for melanin-rich skin can feel overwhelming at first, especially with the sheer volume of products and advice available. However, by adopting a systematic and intentional approach, you can cut through the noise and discover what truly works for your unique complexion. This isn’t about blindly following trends or buying every new product; it’s about becoming an informed consumer and an expert on your own skin.
1. Understand Your Specific Concerns
Before you even think about products, take a close look at your skin in natural light. Identify your primary concerns. Are your under-eyes deeply discolored with a blue-purple hue, or are they just slightly shadowed? Do you have persistent reddish-brown PIH spots, or is it more general unevenness? Is the darkness around your mouth a significant concern, or a subtle variation? Pinpointing the exact nature and depth of your discoloration is the first and most critical step. This clarity will guide your product selection and application strategy.
2. Educate Yourself on Color Theory for Deep Skin
A basic understanding of color theory is your superpower here. Remember that correctors work by neutralizing the opposite color on the color wheel.
- Blue/Purple/Greenish Under-Eyes: Need peach, orange, or red correctors. The deeper the discoloration, the deeper the corrector.
- Reddish/Purplish PIH: Can benefit from yellow-orange or deeper orange correctors.
- General Dullness/Ashiness: Often benefits from warm, golden, or peachy undertones in concealers and foundations.
This knowledge will empower you to select the right corrector shade, rather than guessing or relying on generic recommendations.
3. Start with One Product at a Time
Don’t overhaul your entire routine at once. If you’re new to correctors, start by introducing just one. For example, if under-eye darkness is your biggest concern, invest in a good orange or peach corrector. Learn how to apply it thinly and effectively. Once you’re comfortable with that, then consider if a second, brightening concealer would add value.
Similarly, if you’re exploring multiple concealers, begin with a solid matching concealer. Ensure it blends seamlessly. Then, if you feel a need for more lift or dimension, introduce a brightening concealer. This phased approach prevents overwhelm and allows you to truly assess the impact of each new product.
4. Prioritize Undertone Matching for All Concealers
This is non-negotiable for melanin-rich skin. Whether it’s your matching concealer or your brightening concealer, ensure the undertone complements your skin. For brightening, always opt for a shade that is 1-2 shades lighter but has a warm (peachy or golden) undertone. Avoid anything too cool or starkly light, which will inevitably lead to ashiness or a gray cast. When in doubt, swatch on your jawline and let it dry down to see the true color.
5. Practice and Experiment with Application Techniques
The right products are only half the battle; application is equally important. Experiment with different tools – your ring finger, a damp beauty sponge, various brushes – to see what works best for you. Practice applying thin layers, blending meticulously, and building coverage only where needed. Watch tutorials from makeup artists who specialize in deep skin tones, paying close attention to their techniques for blending and product placement. Don’t be afraid to try different methods until you find what feels most comfortable and effective for you.
6. Observe in Different Lighting
What looks good in your bathroom mirror might look completely different in natural daylight or under artificial office lights. Always check your makeup in various lighting conditions to ensure it looks seamless and natural from all angles. This helps you identify if you’ve applied too much, if there are unblended edges, or if any ashiness has crept in.

7. Remember the Goal: Enhancement, Not Erasure
The ultimate aim of using correctors and multiple concealers is to enhance your natural beauty, not to erase every “imperfection.” It’s about creating a harmonious, balanced complexion that still looks like *your* skin, only better. Embrace the subtle variations in your skin tone, and use these tools to refine and celebrate your unique beauty, rather than trying to achieve an unattainable, airbrushed ideal. This mindset shift is crucial for feeling confident and beautiful in your own skin.
By following these steps, you’ll gain confidence and expertise in using correctors and multiple concealers, transforming your base makeup routine into a precise, empowering, and ultimately rewarding experience tailored specifically for your melanin-rich skin.
Where to Go Next
Understanding correctors and multiple concealers is a significant step in mastering your base makeup, but it’s just one piece of the puzzle. To truly build a flawless and harmonious complexion, it’s essential to see how these techniques integrate with other foundational elements of your makeup routine. Black Beauty Basics is here to guide you through every aspect, ensuring you have a comprehensive understanding of base makeup tailored for melanin-rich skin. Here are some highly recommended articles to deepen your knowledge and refine your skills:
- Demystifying Your Base Products: If you’re still curious about the fundamental differences between foundation, concealer, and powder, or want to understand their individual roles more deeply, start here: What Each Base Product Does on Deep Skin. This article lays the groundwork for understanding why each product is chosen and how it contributes to your overall look.
- Selecting the Perfect Coverage and Finish: Your choice of coverage and finish significantly impacts how your correctors and concealers perform. Learn how to select the ideal foundation and concealer coverage levels and finishes that complement your skin type and desired aesthetic: Choosing Coverage Levels and Finishes for Deep Skin. This will help you avoid a heavy look and ensure your base feels comfortable and looks natural.
- Layering for Every Occasion: Once you understand individual products, the next step is mastering how to layer them for different purposes. Discover how to strategically layer your base products for an effortless everyday look versus a more polished, occasion-ready finish: Layering Base Products for Everyday vs. Occasion Looks. This article will help you integrate your correctors and concealers into a cohesive routine.
- Troubleshooting Common Base Issues: Even with the best techniques, challenges can arise. Learn how to address common base makeup problems specific to deep skin, such as ashiness, creasing, or uneven wear: Troubleshooting Common Base Issues on Deep Skin. This will empower you to fix issues on the fly and refine your application.
- The Ultimate Guide to Undertones: A deep dive into understanding your unique undertones is crucial for selecting *all* your base products, including correctors and concealers. This article will help you accurately identify your undertones for a truly seamless match: Shade Matching Systems and Undertones for Deep Skin.
- Caring for Textured and PIH-Prone Skin: If post-inflammatory hyperpigmentation (PIH) is a recurring concern for you, understanding how to care for your skin is as important as concealing it. Learn about skincare strategies and makeup techniques specifically for textured and PIH-prone skin: Makeup for Textured and PIH-Prone Skin.
- Tailoring Your Routine for Different Settings: Your base makeup needs can vary significantly depending on whether you’re heading to the office, a night out, or being photographed. Explore how to adapt your routine for various scenarios: Everyday vs. Occasion Routines: Office, Night Out, Camera.
By exploring these interconnected topics, you’ll gain a holistic understanding of base makeup architecture for melanin-rich skin, transforming your routine into an intentional and highly effective practice. Each article builds upon the last, guiding you towards a truly perfected and radiant complexion.
Quick Principles
Navigating the world of correctors and multiple concealers for melanin-rich skin can be simplified by adhering to a few core principles. These are the foundational truths that will guide your product selection and application, ensuring you achieve a flawless and natural-looking base without unnecessary complexity or product overload. Keep these in mind as you refine your technique:
- Identify the Problem First: Before reaching for any product, clearly define the specific concern you’re addressing. Is it deep under-eye darkness, a stubborn PIH spot, or general unevenness? Each problem may require a different solution.
- Color Correction Neutralizes, Concealer Covers: Understand the distinct roles. Correctors cancel out unwanted tones (e.g., orange for blue/purple), creating a neutral canvas. Concealers then provide coverage that matches your skin tone. Don’t confuse the two.
- Less is Always More: This is the golden rule. Apply the absolute thinnest layer of corrector, and then minimal amounts of matching and brightening concealers. Over-application is the quickest way to a heavy, cakey, or obvious finish.
- Undertone is Paramount: For melanin-rich skin, selecting products with the correct undertone is critical. For brightening concealers, always choose shades that are 1-2 shades lighter but possess a warm (peachy or golden) undertone to prevent ashiness.
- Blend, Blend, Blend: Seamless transitions are key. Ensure there are no harsh lines or visible edges where one product ends and another begins. Use tapping motions with a finger, sponge, or brush to melt products into the skin.
- Each Product Needs a Job: Don’t use multiple concealers just because you have them. Each product (corrector, matching concealer, brightening concealer) should serve a specific, intentional purpose. If one concealer can do the job, stick with one.
- Strategic Placement for Brightening: Brightening concealers are for adding light and dimension to specific high points, not for broad coverage. Focus on the inner corners of the eyes, the orbital bone, or other areas you wish to subtly lift.
- Check in Natural Light: Always assess your makeup in various lighting conditions, especially natural light, to ensure it looks harmonious and undetectable from all angles.
- Embrace Your Skin’s Natural Beauty: The goal is enhancement and harmony, not erasure. Celebrate the unique variations in your melanin-rich skin, using these tools to refine and perfect, not to mask.
By internalizing these quick principles, you’ll develop an intuitive understanding of how to approach correctors and multiple concealers, leading to a more confident and successful base makeup routine.
| Concern | What May Help | What to Avoid |
|---|---|---|
| Deep Blue/Purple Under-Eyes | Thin layer of peach/orange/red corrector, followed by matching concealer. | Applying only a light concealer directly; thick layers of corrector; cool-toned correctors. |
| Reddish/Brown PIH Spots | Targeted application of yellow-orange/orange corrector, then matching concealer. | Applying only thick matching concealer; rubbing corrector off; using a green corrector (for redness, not brown). |
| Darkness Around Mouth/Chin | Thin wash of warm peach/orange corrector, then matching concealer/foundation. | Heavy application of corrector; trying to completely erase natural pigmentation with a light concealer. |
| Overall Dullness/Ashiness | Foundation/concealer with correct warm/golden undertones; brightening concealer with peach/gold undertones. | Cool-toned or overly light foundations/concealers; heavy powders. |
| Wanting “Bright” Under-Eyes | Correct discoloration first, then use a brightening concealer (1-2 shades lighter, warm undertone) sparingly. | Applying very light, stark concealer without correction; using too much brightening concealer; cool-toned brighteners. |
| Blemishes/Redness | Precision application of matching concealer; green corrector for very intense redness (rarely needed on deep skin). | Rubbing concealer; using too much product; trying to use a brightening concealer for spot coverage. |
| Heavy/Cakey Look | Minimal product, thin layers, tapping application, thorough blending. | Piling on product; swiping motions; using overly thick formulas; skipping blending. |
Frequently Asked Questions
What is the main difference between a color corrector and a concealer for melanin-rich skin?
A color corrector’s primary job is to neutralize unwanted tones (like blue, purple, or red) using opposing colors on the color wheel, creating a neutral base. A concealer, on the other hand, is designed to provide coverage that matches your skin tone, or is slightly lighter for brightening, over that neutralized area or on minor imperfections.
Do I always need to use a color corrector if I have deep skin?
No, not always. You only need a color corrector if you have significant discoloration (like deep under-eye circles or pronounced PIH) that a matching concealer alone cannot effectively cover without looking ashy or requiring excessive product. For minor concerns, a well-matched concealer might be sufficient.
How do I choose the right shade of corrector for my deep skin tone?
For blue/purple under-eyes or dark spots, choose a peach, orange, or red corrector; the deeper the discoloration, the deeper the corrector shade needed. For reddish-brown PIH, a yellow-orange corrector can be effective. Always swatch in natural light to ensure it neutralizes without making the area look orange or muddy.
Can I use a brightening concealer to correct darkness under my eyes?
No, a brightening concealer is not for correcting darkness. Applying a light concealer directly to deep discoloration on melanin-rich skin will often result in an ashy or gray appearance because it doesn’t neutralize the underlying color. First, correct the darkness with an orange/peach corrector, then apply a matching concealer, and *then* use a brightening concealer sparingly for lift.
How many concealers should I realistically have for melanin-rich skin?
You might need one to three: a color corrector (if needed), a matching concealer (essential for coverage), and potentially a brightening concealer (for strategic illumination). The goal is not to accumulate products, but to ensure each product serves a specific, useful purpose for your unique skin concerns.
How do I prevent my under-eye concealer from looking heavy or creasing on deep skin?
Apply very thin layers of product, starting with corrector, then matching concealer, then brightening concealer. Tap or pat the product gently into the skin, avoiding rubbing. Set lightly with a finely milled, translucent, or yellow-toned powder, focusing only on areas prone to creasing, and avoid baking with excessive powder.
What’s the best way to apply multiple concealers for a natural finish?
Always apply correctors first, precisely to the discolored areas, blending lightly. Follow with your matching concealer over the corrected areas and any other imperfections, blending seamlessly into your foundation or skin. Finally, apply a tiny amount of brightening concealer to strategic high points (like inner corners of eyes) and blend gently, ensuring no harsh lines remain.
For more options, you can Shop color corrector palettes for deep skin on Amazon to find a range of shades for your needs.
You might also consider a creamy concealer for dark skin on Amazon for a smooth, non-drying finish.
And don’t forget a brightening concealer with a warm undertone on Amazon to add that perfect lift.
INTERNAL LINKING OPPORTUNITIES
Base Makeup Architecture: Foundation, Concealer, Powder, Correctors
Makeup for Deep Skin Tones
What Each Base Product Does on Deep Skin
Choosing Coverage Levels and Finishes for Deep Skin
Layering Base Products for Everyday vs. Occasion Looks
Troubleshooting Common Base Issues on Deep Skin
Shade Matching Systems and Undertones for Deep Skin
Makeup for Textured and PIH-Prone Skin
Everyday vs. Occasion Routines: Office, Night Out, Camera
Related next steps
Related posts:
 Fixing “Almost Right” Shades with Correctors and Mixers: Your Guide to a Perfect Match
 Layering Base Products for Everyday vs. Occasion Looks on Melanin-Rich Skin
 Skin Type vs. Skin Condition on Melanin-Rich Skin: Unlocking Your Skin’s True Needs
 How to Read Your Undertone on Deep, Melanin-Rich Skin
 Bronzer and Dimension on Melanin-Rich Skin: Unlocking Your Natural Radiance
 How Texture and PIH Show Up on Deep, Melanin-Rich Skin